Achieving a steakhouse-quality sear at home is often treated as a culinary mystery, yet it relies entirely on predictable physical and chemical principles. The contrast between a deeply caramelized, savory crust and a tender, rosy interior is the hallmark of great steak cookery. When executed correctly, a proper sear delivers a crunch that yields to juicy tenderness, elevating the natural flavor of the beef.
Too often, home cooks end up with a disappointing compromise: an uneven, grayish-brown surface accompanied by a thick, rubbery ring of overcooked meat beneath the crust, commonly known as the gray band. Alternatively, cooks burn the exterior while the interior remains cold and raw. Overcoming these hurdles does not require commercial kitchen equipment, but it does demand an understanding of thermal transfer, surface moisture, and fat dynamics.
Cut Selection and the Importance of Thickness
A legendary sear begins at the butcher counter. The physical dimensions of the steak dictate how aggressively you can apply heat to the exterior without overcooking the center.
Steaks cut thinner than an inch and a half pose a serious mechanical challenge. Because heat moves rapidly through meat, a thin cut will reach medium or well-done before the surface has had enough time to undergo proper caramelization. For pan-searing, aim for a cut that is at least one and a half to two inches thick. Cuts like ribeye, New York strip, and thick-cut porterhouse provide the thermal buffer required to build a dark, textured crust while preserving a medium-rare core.
Marbling also plays a foundational role in thermal conduction. Lean cuts like tenderloin contain minimal intramuscular fat, meaning they rely almost entirely on external cooking oils for heat transfer. Highly marbled cuts, such as prime-grade ribeyes, render internal fat as they heat. This rendered beef tallow bastes the muscle fibers from within and promotes a rich, uniform exterior crunch. If your steak features a thick exterior fat cap, trim it down to roughly a quarter of an inch. Leaving too much fat invites curling during cooking, which lifts the meat off the pan surface.
Eradicating Surface Moisture
Moisture is the absolute enemy of the sear. When meat hits a hot skillet, the browning you seek is driven by the Maillard reaction, a complex cascade of chemical reactions between amino acids and reducing sugars. The Maillard reaction occurs rapidly only at temperatures above 300 degrees Fahrenheit.
Water, however, cannot exceed 212 degrees Fahrenheit at sea level in an open pan. If the exterior of your steak is wet, all the thermal energy from the pan goes into boiling off surface water instead of searing the meat. In effect, the steak steams in its own juices until the liquid evaporates, leaving behind a dull gray exterior.
The Dry-Brine Method
The most effective technique for banishing surface moisture is an extended dry brine in the refrigerator:
-
Place the steak on a wire cooling rack set inside a rimmed baking sheet.
-
Season all sides generously with kosher salt.
-
Transfer the uncovered steak to the refrigerator for a minimum of twelve hours, and ideally up to twenty-four hours.
During this resting period, the salt initially draws moisture out of the meat through osmosis. As the salt dissolves in these surface juices, it creates a concentrated brine that gradually breaks down muscle proteins, allowing the seasoned liquid to be drawn back deep into the tissue. Meanwhile, the circulating, dehumidified air of the refrigerator evaporates any remaining surface water. The result is a bone-dry, deeply reddish exterior known as a pellicle, which caramelizes almost instantaneously when it touches a hot cooking surface.
If time does not allow for an overnight dry brine, dry the meat manually. Use multiple changes of paper towels, pressing firmly against all surfaces, including the sides, until the paper pulls away completely dry.
Salting Dynamics and Timing
When you salt your steak matters just as much as how much salt you use. Salting creates an osmotic reaction that changes the surface chemistry of the meat over time.
There are two optimal windows for salting a steak. The first is at least forty-five minutes before cooking, though twelve to twenty-four hours is far superior. Forty-five minutes gives the salt enough time to draw moisture out, dissolve, and reabsorb back into the interior.
The second acceptable window is immediately before the steak hits the pan, within thirty seconds of cooking. Salting right before cooking seasons the exterior without giving the salt crystals enough time to pull liquid out of the muscle fibers.
The worst mistake is salting a steak ten to fifteen minutes before cooking. Within this window, the salt has pulled water to the surface, but the liquid has not yet had time to reabsorb. Placing a steak in this state into a hot pan guarantees an aggressive drop in pan temperature and unwanted steaming.
Cookware Selection and Thermal Mass
The pan you choose directly influences how heat transfers into the meat. Lightweight nonstick pans have no place in high-heat searing. Nonstick coatings degrade and release harmful fumes at high temperatures, and thin pans lack the mass required to hold heat when a cold slab of beef is introduced.
Reach for heavy-gauge cast iron, carbon steel, or thick clad stainless steel. These metals boast high volumetric heat capacity. While cast iron heats relatively slowly and can develop hot spots, its immense mass acts as a heat battery. When an eight-ounce or twelve-ounce steak touches the iron, the skillet does not experience a dramatic drop in temperature. It maintains the intense heat necessary to flash-sear the surface instantly.
Preheat your skillet over medium to medium-low heat for eight to ten minutes rather than blasting it on high for two minutes. A slow preheat ensures the heat saturates the entire thickness of the metal, eliminating cold spots and providing an even, radiant cooking zone across the entire base of the pan.
Choosing the Right Cooking Fat
Using the wrong fat can ruin a sear by introducing acrid, burnt notes before the meat develops a balanced crust. Fats with low smoke points break down quickly under intense heat, releasing bitter chemical compounds and filling your kitchen with choking smoke.
Avoid whole butter, unrefined olive oil, and extra virgin oils for the primary searing phase. Whole butter contains roughly sixteen to eighteen percent water and several percent milk solids. The water encourages steaming, while the milk solids scorch and turn bitter at temperatures above 350 degrees Fahrenheit.
Instead, select cooking fats with high smoke points and clean flavors:
-
Avocado Oil: Smoke point around 520 degrees Fahrenheit; neutral flavor.
-
Clarified Butter or Ghee: Smoke point around 485 degrees Fahrenheit; delivers rich buttery notes without milk solids that burn.
-
Rendered Beef Tallow: Smoke point around 400 degrees Fahrenheit; reinforces the natural beefy richness of the cut.
-
Grapeseed Oil: Smoke point around 420 degrees Fahrenheit; clean, affordable, and widely available.
Apply the fat directly to the steak rather than pouring a pool of oil into the pan. Lightly rubbing a thin sheen of oil over the salted meat ensures uniform thermal contact and prevents the oil from smoking needlessly on exposed areas of the hot iron.
Maximizing Surface Contact and Pressure
A pan can only sear the meat it physically touches. Raw steaks rarely feature a perfectly flat plane; muscle fibers contract under heat, causing the edges to curl and creating air pockets beneath the meat. Since air is an exceptionally poor heat conductor compared to hot metal, these elevated spots remain pale while adjacent areas brown.
To guarantee complete contact, place the steak in the hot skillet and immediately apply firm, even pressure across the top using a stiff spatula, a grill press, or a small cast-iron weight. Maintain this pressure for the first thirty to forty-five seconds of cooking. This initial press anchors the meat against the pan while the exterior proteins set, locking in a flat profile.
If your steak has a significant strip of fat or connective silverskin along the edge, score it every inch and a half with a sharp knife before cooking. Scoring cuts through the contracting connective tissue, preventing the steak from cupping like a shallow bowl as it cooks.
The Case for Frequent Flipping
Traditional culinary dogma insisted that a steak should only be flipped once during cooking. Modern food science has soundly dismantled this rule.
Flipping a steak only once forces one side to endure continuous high heat for several minutes. While this eventually creates a crust, it drives a deep wave of excessive heat into the interior, resulting in a wide, gray band of overcooked meat surrounding a small core of pink.
Flip your steak frequently, roughly every thirty to forty-five seconds. Frequent flipping provides distinct mechanical advantages:
-
Neither side spends enough time against the metal to scorch.
-
The side facing upward cools slightly, preventing heat from penetrating too aggressively into the center.
-
Surface moisture evaporates continuously as each side is exposed to air, accelerating crust formation.
-
Cooking time decreases by roughly twenty to thirty percent because both sides absorb heat in rapid, alternating pulses.
The result of frequent flipping is a crisp, deeply browned crust flanking an edge-to-edge medium-rare interior with virtually no gray ring.
The Finishing Butter Baste
While whole butter should never be used to start a sear, it plays an indispensable role at the end of the cooking process through the classic technique known as arrosé, or butter-basting.
When the internal temperature of your steak sits roughly fifteen degrees below your final target, drop the heat to medium-low. Add two to three tablespoons of unsalted butter to the pan along with smashed garlic cloves, fresh rosemary, and thyme sprigs. As the butter melts, tilt the skillet slightly toward you so the melted fat pools along the bottom edge.
Using a large metal spoon, continuously scoop the foaming butter and cascade it over the top of the steak. The foaming milk solids gently brown in the hot fat, imparting a nutty aroma while flowing into every micro-crevice of the meat. This process builds a complex secondary layer of flavor, enhances the deep mahogany color, and perfumes the steak with the aromatics without burning them.
The Reverse Sear for Extra-Thick Cuts
For steaks measuring two inches or thicker, the standard pan-searing method can struggle to cook the center without over-caramelizing the exterior. In these scenarios, the reverse sear technique is the gold standard.
Instead of searing first and finishing in the oven, reverse the order. Place your salted, dry-brined steak on a wire rack in an oven preheated to a low temperature, between 225 and 250 degrees Fahrenheit. Allow the steak to warm gently until its core reaches roughly 110 to 115 degrees Fahrenheit for medium-rare.
This slow, gentle warmup yields two major benefits. First, it brings the interior to an even temperature from center to edge. Second, the dry, warm oven air completely dehydrates the surface of the meat.
Once removed from the oven, the steak is placed into a blisteringly hot cast-iron skillet with a thin film of beef tallow or high-smoke-point oil. Because the surface is warm and completely free of moisture, a dark, shattering crust forms in just forty-five to sixty seconds per side, eliminating the risk of overcooking the core.
Resting and Managing Post-Cook Vapor
Your work is not finished when the steak leaves the pan. How you handle the meat during the resting phase directly dictates whether your crust survives until the first bite.
Never transfer a freshly seared steak to a flat plate or a smooth cutting board. As the hot meat rests, moisture vapor continues to escape from the bottom surface. On a flat plate, this vapor has nowhere to go; it condenses against the ceramic surface and pools directly beneath the steak, rapidly turning your hard-earned crust into a soggy, wet mess.
Instead, rest the steak on a clean wire cooling rack for five to eight minutes. Resting on an elevated wire grid allows air to circulate beneath the meat, keeping the bottom crust crisp while the internal muscle fibers relax and reabsorb their juices.
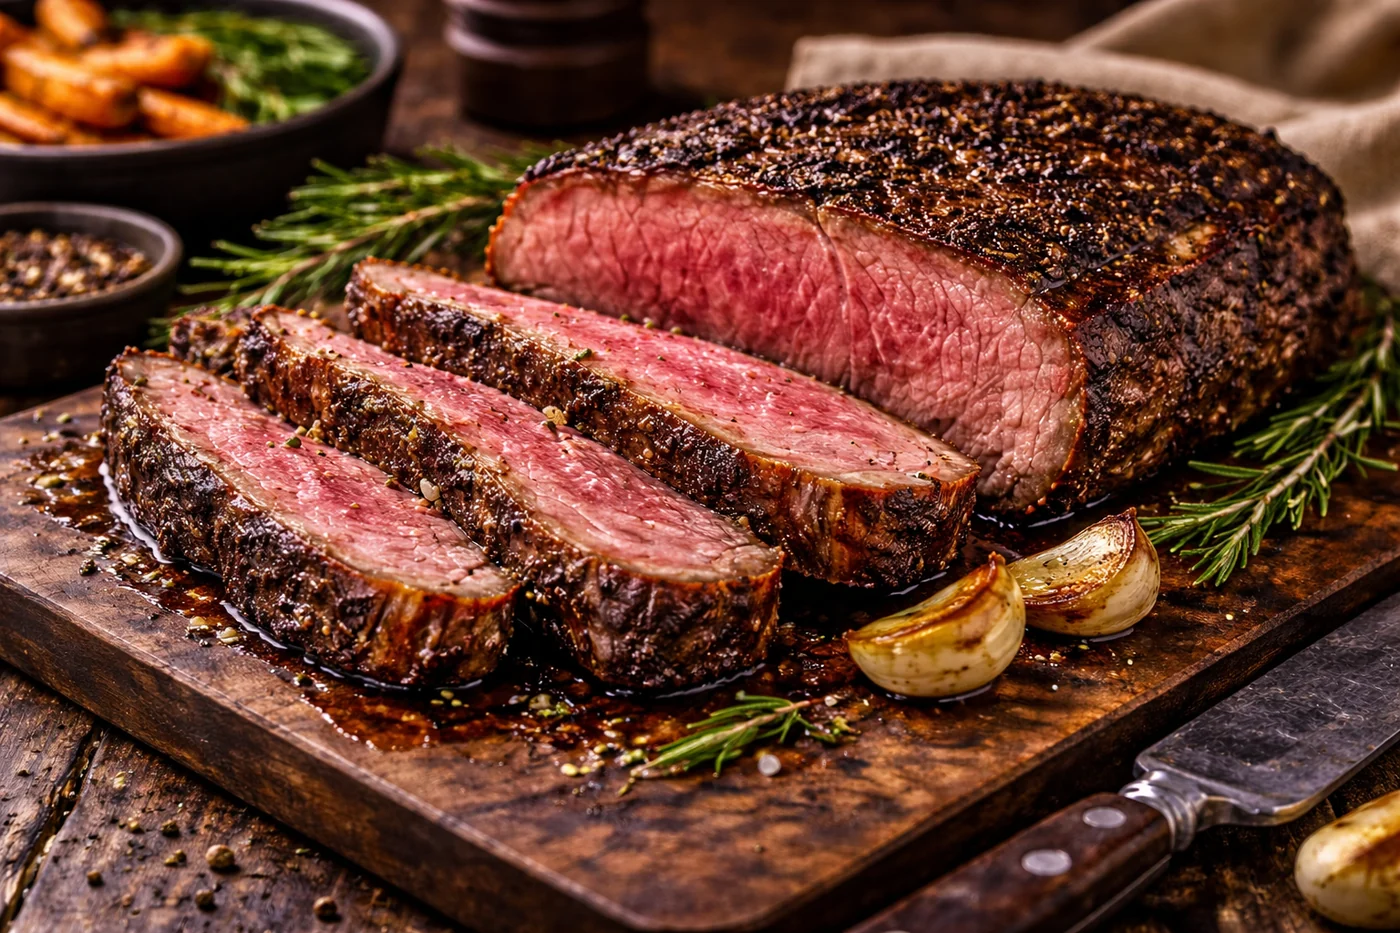
Carve the steak across the grain with a sharp, non-serrated slicing knife to ensure optimal tenderness. Right before serving, sprinkle the cut slices with coarse, flaky sea salt. The large, delicate salt crystals provide a clean burst of mineral crunch that cuts through the rich fat and emphasizes the complex savory notes of the sear.
Mastering the steak sear is a craft defined by disciplined preparation rather than culinary luck. By eliminating moisture, harnessing high thermal mass, respecting fat behavior, and abandoning outdated cooking myths, you can reliably produce steaks that rival the finest chophouses in the country.
Meta Title: Essential Cooking Tips for Achieving the Ultimate Steak Sear
Meta Description: Learn how to achieve a perfect, steakhouse-quality sear at home with expert tips on moisture control, pan selection, flipping methods, and butter basting.