Deep frying has an unearned reputation in home kitchens as a chaotic, messy, and inherently greasy cooking method. Many home cooks approach the process with hesitation, imagining clouds of acrid smoke, splattering oil across countertops, and food that turns out heavy and sodden. Yet, when executed with precision, deep frying is one of the cleanest, fastest, and most chemically elegant ways to cook.
The secret to restaurant-quality fried food does not lie in commercial-grade equipment or guarded batter recipes. It rests entirely on understanding and controlling thermal dynamics. Deep frying is fundamentally a dehydration process that uses hot liquid fat as a rapid, uniform heat-transfer medium. The extreme heat flash-cooks the surface of the food, turning internal water into pressurized steam. This steam pushes outward through the crust, preventing the cooking oil from soaking into the food while cooking the interior to tender perfection.
When your oil temperature is dialed in, food emerges remarkably light, crisp, and grease-free. When temperature control slips, however, that outward vapor pressure collapses, and the oil floods the interior of your food, resulting in a soggy, oily failure. Mastering the heat ensures both culinary excellence and total kitchen safety.
Selecting the Right Fat: Smoke Points and Thermal Stability
Your journey toward temperature control begins with the oil you pour into the pot. Cooking fats behave very differently under sustained, high-heat conditions. Choosing an improper oil sabotages your cook before you even turn on the burner.
Every cooking fat has a specific smoke point—the temperature at which the volatile compounds within the oil begin to break down, produce visible smoke, and release bitter, acrid flavors along with free radicals. For deep frying, which typically requires sustained heat between 325 and 375 degrees Fahrenheit, you need an oil with a smoke point well above 400 degrees.
Refined peanut oil remains the gold standard for home frying due to its 450-degree smoke point, neutral flavor profile, and outstanding heat stability. If peanut allergies are a concern, refined canola oil, safflower oil, and corn oil serve as accessible, dependable alternatives with high smoke points and minimal flavor transfer.
For cooks seeking richer, traditional profiles, rendered beef tallow or lard offers extraordinary thermal stability. Because animal fats consist predominantly of saturated and monounsaturated fatty acids, they resist oxidation and thermal degradation far better than delicate polyunsaturated seed oils.
Never use extra virgin olive oil, unrefined seed oils, or whole butter for deep frying. These fats contain water, free fatty acids, and unrefined proteins that burn aggressively at temperatures as low as 320 degrees Fahrenheit, creating noxious fumes and ruining both the food and the kitchen air.
Essential Gear for Precision and Thermal Stability
Attempting to deep fry without accurate temperature measurement is essentially gambling. Relying on folklore—such as watching for tiny bubbles around the handle of a submerged wooden spoon—is dangerously misleading. Water inside wood will bubble at 212 degrees Fahrenheit, which is well below the minimum threshold required for frying.
Dedicated Thermometers Versus Visual Cues
A reliable thermometer is your primary control mechanism. An analog, stainless steel clip-on candy and deep-fry thermometer is an inexpensive, durable choice. It fastens directly to the lip of the pot, keeping the probe suspended in the middle of the oil bath without touching the conductive metal floor of the pan.
For even greater accuracy, use a digital probe thermometer equipped with a high-heat cable and an adjustable temperature alert. Setting an alarm five degrees below your target allows you to adjust the flame before the oil overshoots its mark.
Avoid relying on handheld infrared laser thermometers. While infrared devices excel at reading surface temperatures on a cast-iron skillet, they only measure the reflective, uppermost sheen of a liquid fat bath, often reading ten to twenty degrees cooler than the convective oil circulating beneath the surface.
Choosing the Proper Vessel for Heat Retention
The pot you choose dictates how resilient your oil bath will be against sudden temperature drops. Thin, lightweight aluminum or nonstick saucepans are dangerous choices for deep frying. They lose heat instantaneously when cold food is added, and their thin walls develop scorching hot spots that degrade the oil.
Reach instead for a heavy enameled cast-iron Dutch oven or a heavy-gauge, multi-clad stainless steel pot. Thick cast iron boasts high thermal mass, acting like an energy reservoir that absorbs heat from the burner and steadily radiates it into the oil.
Furthermore, pot geometry is critical for safety. Never fill any pot more than halfway with oil, and ideally keep it to one-third full. As food is lowered into the fat, moisture rapidly expands into foam, raising the liquid level significantly. Maintaining at least three to four inches of clearance between the surface of the oil and the top rim of the pot provides the headroom needed to prevent dangerous boil-overs.
Navigating the Temperature Drop: The Science of Batch Management
The most challenging phase of temperature control occurs the second raw food enters the vessel. Introducing a pound of refrigerator-cold chicken thighs or chilled, battered fish into four quarts of hot fat creates an immediate thermal shock.
Depending on the volume of food and oil, your bath temperature can easily plummet by 30 to 60 degrees within fifteen seconds. If the oil drops below 300 degrees, the bubbling steam slows down, the crust fails to set rapidly, and the food begins to absorb fat like a sponge.
To counter this inevitable drop, utilize compensatory heating. If your target cooking temperature is 350 degrees, heat the oil to 365 or 370 degrees before adding the food. As soon as the ingredients enter the pot, the temperature will drop directly into your desired 350-degree cooking pocket.
At the exact moment you drop the food, proactively raise your stove burner by a notch or two to fight the incoming cold mass. Once the bubbling stabilizes and the thermometer confirms the oil has plateaued at your target range, dial the burner back down to maintain steady equilibrium.
Equally important is resisting the temptation to overcrowd the pot. Frying in small, disciplined batches is essential. Crowding too many cold items into the vessel drops the temperature so low that the burner cannot recover before the food is ruined. A useful rule of thumb is to ensure that floating items have enough room to bob freely without touching or stacking on top of one another.
Managing Surface Moisture and Splatter Hazards
Water and hot oil do not mix, and understanding this physical boundary is fundamental to deep-fry safety. Water boils at 212 degrees Fahrenheit. Cooking oil operates more than a hundred degrees hotter. When liquid water contacts 350-degree oil, it vaporizes instantaneously, expanding into steam by roughly 1,600 times its original volume. This violent volumetric expansion throws atomized hot fat into the air, generating explosive pops, splatters, and potential grease fires.
Controlling your cook requires aggressive moisture management on the surface of your ingredients:
-
Dry Proteins Thoroughly: Pat raw meats, poultry, and potatoes aggressively with paper towels before breading or dropping them into the oil.
-
Embrace the Chill and Air-Dry: For items like chicken wings or french fries, letting them sit uncovered on a wire rack in the refrigerator for a few hours dries the outer skin, creating a barrier that yields superior crunch without violent bubbling.
-
Sift Away Loose Breading: Excess dry flour, cornstarch, or breadcrumbs that fall off food will sink to the bottom of the pot, burning into bitter charcoal and clouding the oil. Shake off excess coatings using a wire mesh strainer before frying.
-
Clear Ice Crystals: Never drop frozen food with surface frost into hot oil. Knock off all visible ice crystals outside the pot before gently lowering the items into the fat.
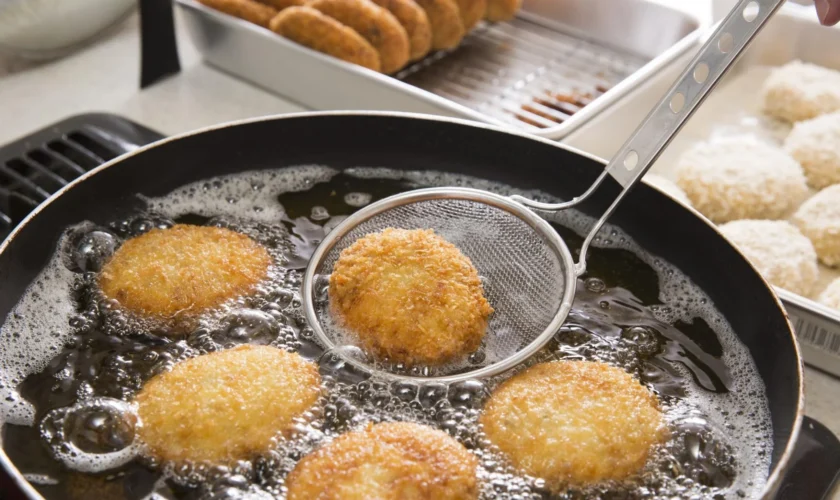
When adding food to the pot, always lower it away from your body using a wire spider strainer, metal tongs, or a slotted spoon. Dropping food straight down from your fingers causes splashing that can burn your hands or ignite on the burner below.
Recovery Time: The Forgotten Step in Multi-Batch Cooking
One of the most frequent mistakes made by home cooks happens between batches. After pulling a gorgeous, golden batch of tempura or hushpuppies from the pot, the natural instinct is to drop the next portion immediately.
Doing so is a recipe for greasy, undercooked food. Pulling food out leaves the oil at a depleted temperature, and introducing fresh, cold ingredients without pausing drives the heat down even further.
Between every single batch, you must observe recovery time. Allow the oil to sit undisturbed over medium heat until the thermometer climbs back up to your target temperature—plus the compensatory cushion needed for the drop.
During this brief window, use a fine-mesh skimmer to scoop out any floating crumbs, stray batter beads, or sediment lingering on the surface or bottom of the oil. Removing these particulates prevents them from burning, which preserves the clean flavor of the fat and extends the usable life of the oil for subsequent batches.
Recognizing Degradation and Safe Post-Fry Management
Cooking oil is an organic material that degrades through heat, oxidation, and contact with water and food particles. As oil breaks down through repeated heating, its chemical structure changes, causing its smoke point to drop steadily.
Knowing when oil has reached the end of its lifespan is vital for both food flavor and safety. Discard your oil if you observe any of the following warning signs:
-
The oil turns noticeably dark, viscous, or syrupy.
-
A persistent, soapy-looking foam forms on the surface and refuses to dissipate.
-
The oil begins smoking well before reaching standard frying temperatures.
-
The aroma turns acrid, fishy, or rancid, even before food is introduced.
Once cooking is complete, turn off the burner immediately and slide the pot to a cool, unlit burner. Hot oil retains immense heat and can take several hours to cool down to room temperature safely. Never attempt to move, pour, or filter a pot of hot oil.
Once completely cool, strain the oil through a fine-mesh sieve lined with a coffee filter or cheesecloth into an airtight container. Store it in a cool, dark cupboard for future use. If disposing of old oil, never pour it down the sink drain, where it solidifies and causes severe plumbing blockages. Pour it into a sealed, non-recyclable container, such as an empty coffee tin or milk carton, and place it directly into the household trash.
Essential Fire Safety Protocols
Even the most careful cook must know how to respond instantly in the unlikely event of an equipment failure or grease fire. A grease fire occurs when oil is heated past its flash point, allowing vapors to ignite.
The absolute golden rule of deep frying is: never use water on a grease fire. Pouring water onto burning oil causes the water to sink, superheat, vaporize into steam, and violently blast burning fat across the kitchen in a massive fireball.
If your oil catches fire, stay calm and take immediate, decisive action. Turn off the heat source if you can safely reach the dial. Slide a flat metal baking sheet or a tight-fitting metal pot lid over the pot to starve the flame of oxygen. You can also smother small grease flares with generous amounts of baking soda or salt. Never use flour, cornstarch, or baking powder, as airborne starches can combust. Keep a functioning Class B or dry-chemical kitchen fire extinguisher accessible in your kitchen whenever you fry.
Deep frying at home should never be an unpredictable, high-stress endeavor. By investing in heavy cookware, monitoring temperatures with accurate probes, respecting batch sizes, and managing moisture, you transform frying from an intimidating challenge into a precise, repeatable craft that produces stunning culinary results every time.