Maintaining a sourdough starter is an exercise in routine. Every feeding cycle produces a byproduct that many bakers hesitate to discard: a murky, acidic, bubbling jar of unfed flour and water. Pouring that jar down the drain feels wasteful, yet the prospect of building a separate, complex baking project around leftover batter can quickly lead to baker fatigue.
Sourdough discard does not need to be treated as a nuisance or relegated to dense, gummy baked goods. When you understand how unfed starter interacts with fats, heat, and chemical leaveners, discard transforms into a valuable culinary asset. It contributes complex lactic acidity, depth of flavor, and structural tenderness that fresh flour and water simply cannot replicate.
Two applications showcase the unique properties of sourdough discard better than any others: wafer-thin, shatteringly crisp crackers and tall, cloud-soft breakfast pancakes. Both recipes forgive slight variations in hydration, work around busy schedules, and yield reliable results every time.
Understanding Your Discard Before You Bake
Before measuring ingredients, it helps to understand what sourdough discard actually contributes to a recipe. In an active starter, the wild yeast and lactic acid bacteria produce carbon dioxide gas to leaven bread. In discard, the yeast has exhausted its readily available food supply. As a result, discard provides minimal lift on its own.
What it does provide is liquid, flour, and acidity. Most home bakers maintain their starter at 100% hydration, meaning it consists of equal parts flour and water by weight. If you measure out 200 grams of discard, you are adding roughly 100 grams of flour and 100 grams of water to your mixing bowl.
The age of the discard directly influences the flavor and structure of your bake:
-
Fresh discard (1 to 3 days old, stored in the refrigerator) has a mild, milky aroma and minimal gluten degradation. It produces a subtle tang that complements sweet additions like maple syrup or blueberries.
-
Aged discard (one week or older) carries a sharp, vinegar-like acidity and a thin layer of grey liquid on top known as hooch. While you can stir hooch back into the starter for extra punch or pour it off for a milder profile, aged discard weakens gluten structures significantly. This weakening is detrimental to artisan bread, but it is an advantage for delicate pastries, crackers, and tender pancakes.
Temperature also plays a role. While you should never mix cold milk or eggs into melted butter when baking a cake, cold discard works well in cracker dough because cold fat creates a flakier crumb. For pancakes, allowing the discard to sit at room temperature for 15 to 20 minutes allows the chemical leaveners to activate more smoothly.
Shatter-Crisp Sourdough Discard Crackers
Commercial crackers often rely on vegetable oils, emulsifiers, and artificial flavorings to achieve shelf stability and crunch. Homemade sourdough crackers require only three basic elements: discard, fat, and salt.
The natural acid in the discard breaks down tough gluten strands, allowing you to roll the dough paper-thin without it snapping back excessively. As the moisture bakes out, the fat laminates the dough microscopically, yielding a cracker with the delicate snap of a fine tavern biscuit.
The Master Cracker Formula
This ratio scales easily depending on how much discard you have accumulated in your refrigerator.
-
200 grams sourdough discard (stirred down, unfed)
-
30 grams unsalted butter, melted and cooled slightly (or 25 grams extra-virgin olive oil)
-
2 grams fine sea salt (about half a teaspoon)
-
Coarse salt, dried herbs, or cracked pepper for topping
Step-by-Step Method
Begin by combining the discard, melted butter, and fine sea salt in a medium mixing bowl. Stir with a sturdy silicone spatula until the fat is fully incorporated and the mixture forms a smooth, cohesive paste. If your discard was quite runny, you may need to stir in one or two tablespoons of all-purpose flour until it resembles a pliable, soft dough.
Line a large baking sheet with parchment paper. Turn the dough out directly onto the parchment. Lay a second sheet of parchment paper over the dough to prevent sticking. Using a rolling pin, roll the dough outward from the center toward the edges.
The secret to foolproof crackers is even thickness. Aim for roughly one-sixteenth of an inch (1.5 millimeters). If the edges are significantly thinner than the center, they will scorch before the middle crisps up. Once rolled, peel away the top sheet of parchment paper.
Slide the parchment paper with the rolled dough onto your baking sheet. Use a pastry wheel, pizza cutter, or sharp knife to score the dough into one-and-a-half-inch squares. Dock each square once or twice with the tines of a fork to prevent steam bubbles from ballooning the crackers during baking.
Brush the surface lightly with water or olive oil, then scatter your chosen toppings evenly over the surface. Gently press the seasonings into the dough with your palms so they adhere.
Bake at 325°F (165°C) for 25 to 35 minutes. Rotate the pan halfway through the bake. Check the crackers frequently after the 20-minute mark; crackers go from pale gold to burnt very quickly. The crackers are done when the edges are deep golden brown and the centers feel dry and rigid to the touch.
Turn off the oven, prop the door open slightly with a wooden spoon, and let the crackers sit inside for 10 minutes. This gentle ambient heat dries out any remaining moisture without scorching the crust. Remove, cool completely on a wire rack, and break apart along the scored lines.
Flavor Customization
The neutral tang of sourdough makes an ideal backdrop for savory flavor combinations. Consider these kitchen-tested variations:
-
Aged White Cheddar and Smoked Paprika: Fold 30 grams of finely grated sharp cheddar and a half-teaspoon of smoked paprika directly into the dough before rolling.
-
Seeded Everything: Skip internal add-ins, brush the dough with olive oil, and generously coat the surface with equal parts black sesame seeds, white sesame seeds, poppy seeds, dried minced garlic, and flaky sea salt.
-
Rosemary and Olive Oil: Substitute fruity extra-virgin olive oil for the butter, and fold two teaspoons of finely minced fresh rosemary into the dough.
Cloud-Light Sourdough Discard Pancakes
Many sourdough pancake recipes yield flat, rubbery discs because bakers treat discard like a leavening agent. Discard cannot lift heavy pancake batter on its own. Instead, it serves as the ultimate acidic base for a chemical leavening reaction.
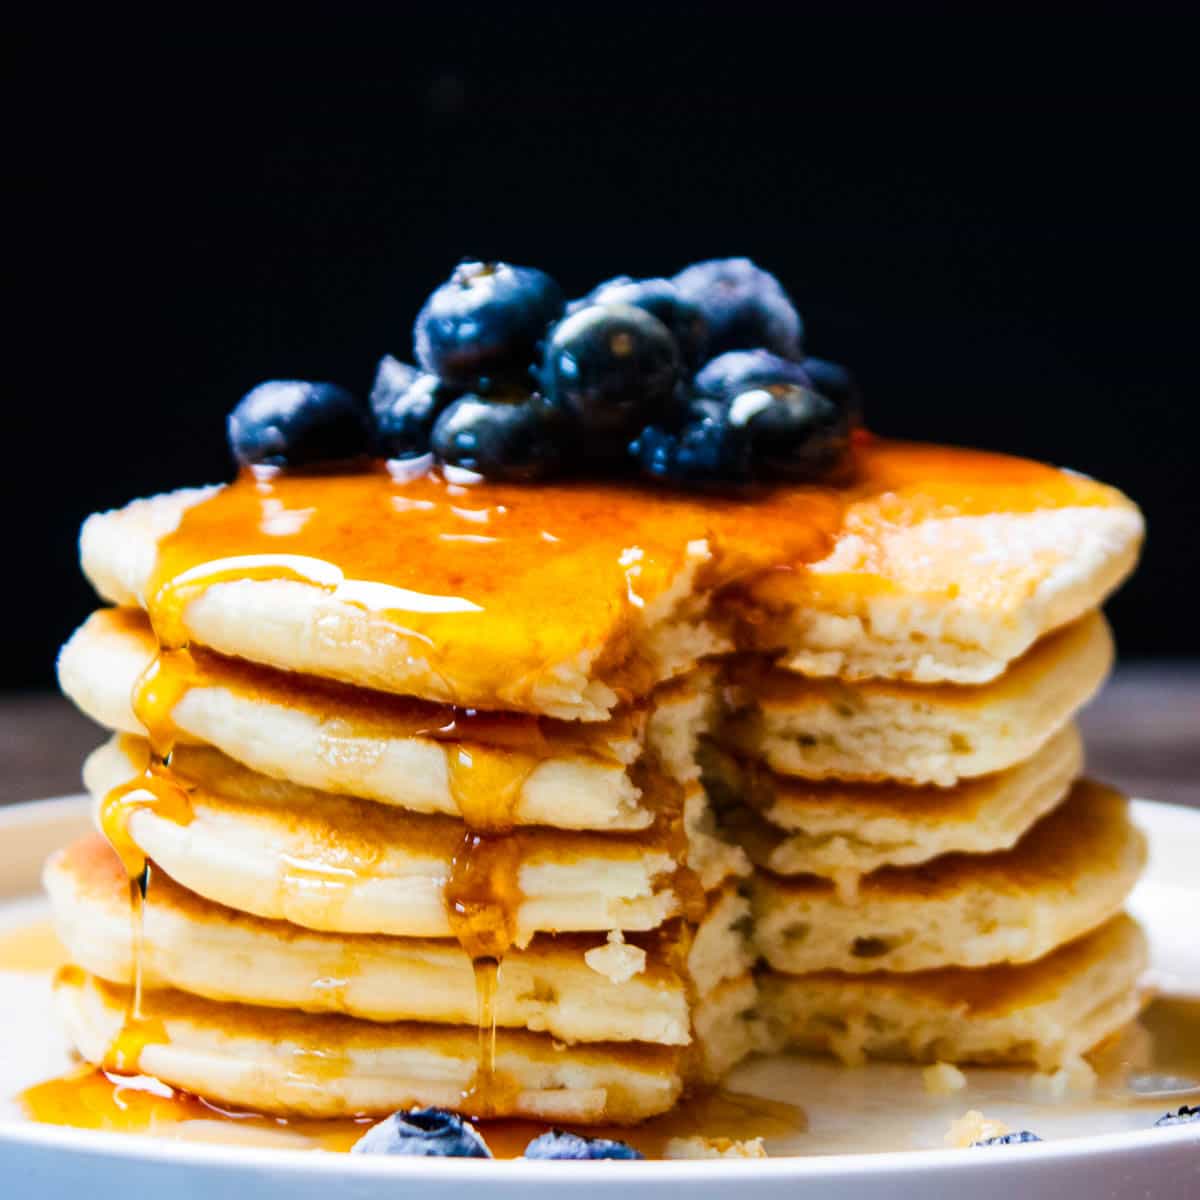
When the lactic and acetic acids in sourdough discard meet baking soda, a rapid chemical reaction occurs. Carbon dioxide gas generates immediately, foaming the batter into an airy mousse. When that batter hits a hot griddle, the trapped gas pockets expand rapidly, producing pancakes that are thick, tender, and light.
The Master Pancake Recipe
This recipe makes roughly eight to ten four-inch pancakes, serving three to four people.
-
240 grams sourdough discard (room temperature preferred)
-
120 grams all-purpose flour
-
15 grams granulated sugar
-
5 grams baking powder (one teaspoon)
-
3 grams baking soda (half a teaspoon)
-
2 grams fine sea salt (half a teaspoon)
-
1 large egg
-
180 grams whole milk (or buttermilk for extra tang)
-
45 grams unsalted butter, melted and cooled
-
5 grams pure vanilla extract (one teaspoon)
Step-by-Step Method
In a large bowl, whisk together the all-purpose flour, granulated sugar, baking powder, baking soda, and salt. Whisking dry ingredients thoroughly ensures the baking soda is evenly dispersed, which prevents pockets of bitter, soapy residue in the finished pancakes.
In a separate medium bowl, whisk together the sourdough discard, milk, egg, melted butter, and vanilla extract until completely smooth.
Pour the wet mixture into the dry ingredients. Use a wide spatula to fold the batter together using gentle, sweeping strokes. Do not overmix. Stop as soon as the flour pockets disappear; the batter should remain noticeably lumpy. As you fold, you will see the batter visibly puff and foam as the discard’s acid reacts with the baking soda. Let the batter rest undisturbed for five minutes while you heat your pan.
Preheat a heavy cast-iron skillet or griddle over medium heat until a drop of water skitters across the surface and evaporates. Lightly coat the cooking surface with a small amount of neutral oil or clarified butter (regular butter contains milk solids that burn during extended pancake sessions).
Drop one-third cup of batter onto the hot griddle for each pancake. Cook until the underside turns a deep golden brown and bubbles form across the surface, roughly two to three minutes. Because this batter is exceptionally thick and airy, look for bubbles that burst and leave open craters at the edges before flipping.
Slide a thin spatula cleanly underneath the pancake and flip in one swift motion. Cook the second side for another one to two minutes until lightly browned and cooked through the center. Serve immediately, or keep the finished batch warm in a 200°F (95°C) oven on a wire-rimmed baking sheet while you cook the remainder.
Perfecting the Pancake Crumb
If your pancakes turn out gummy in the middle, the culprit is almost always stove heat that is set too high. The sugar and acid in sourdough batter cause it to brown faster than standard pancake batter. If the heat is aggressive, the exterior caramelizes before the interior starch gelatinizes. Lower the burner slightly and allow the pancakes to cook slowly so the interior crumb sets properly.
If you enjoy additions like fresh blueberries or chopped toasted pecans, drop them directly onto the raw, bubbling tops of the pancakes while they cook on their first side rather than stirring them into the main mixing bowl. This prevents the delicate, airy batter from deflating during the fold.
Storing Discard and Managing Baking Workflow
Getting the most out of sourdough discard comes down to storage hygiene. Keep a clean, airtight glass container dedicated solely to discard in your refrigerator. Whenever you feed your mother starter, pour the surplus directly into this jar. Discard kept chilled in this manner remains safe and usable for up to three weeks.
If liquid collects on top of your discard, inspect it. Clear or light amber liquid is normal hooch and can be stirred back in or poured off. If the liquid turns pink, orange, or shows any signs of mold, discard the entire contents and sanitize the jar before restarting.
Crisped crackers should be cooled completely to room temperature before being transferred to an airtight glass container or metal tin. Stored in a dry pantry away from direct heat, they retain their crispness for up to two weeks. If they begin to soften due to ambient humidity, arrange them on a baking sheet and refresh them in a 300°F (150°C) oven for five minutes.
Pancakes freeze exceptionally well. Allow leftover pancakes to cool completely, stack them with small squares of parchment paper between each layer, and seal them inside a freezer-safe silicone or plastic storage bag. Reheat them directly from frozen in a standard toaster on a medium setting; the toaster warms the interior while restoring the delicate crispness of the outer crust.
Sourdough discard baking is not about cutting corners or settling for second-best textures. With the right technique, these recipes turn everyday baking surplus into staple items that stand firmly on their own culinary merits.