
close

Stefan Jadiel

Food

Foolproof Sourdough Discard Recipes for Crisp Crackers and Fluffy Pancakes

Maintaining a sourdough starter is an exercise in routine. Every feeding cycle produces a byproduct that many bakers hesitate to discard: a murky, acidic, bubbling jar of unfed flour and water. Pouring that jar down the drain feels wasteful, yet the prospect of building a separate, complex baking project around leftover batter can quickly lead to baker fatigue.
Sourdough discard does not need to be treated as a nuisance or relegated to dense, gummy baked goods. When you understand how unfed starter interacts with fats, heat, and chemical leaveners, discard transforms into a valuable culinary asset. It contributes complex lactic acidity, depth of flavor, and structural tenderness that fresh flour and water simply cannot replicate.
Two applications showcase the unique properties of sourdough discard better than any others: wafer-thin, shatteringly crisp crackers and tall, cloud-soft breakfast pancakes. Both recipes forgive slight variations in hydration, work around busy schedules, and yield reliable results every time.

Understanding Your Discard Before You Bake

Before measuring ingredients, it helps to understand what sourdough discard actually contributes to a recipe. In an active starter, the wild yeast and lactic acid bacteria produce carbon dioxide gas to leaven bread. In discard, the yeast has exhausted its readily available food supply. As a result, discard provides minimal lift on its own.
What it does provide is liquid, flour, and acidity. Most home bakers maintain their starter at 100% hydration, meaning it consists of equal parts flour and water by weight. If you measure out 200 grams of discard, you are adding roughly 100 grams of flour and 100 grams of water to your mixing bowl.
The age of the discard directly influences the flavor and structure of your bake:
  • Fresh discard (1 to 3 days old, stored in the refrigerator) has a mild, milky aroma and minimal gluten degradation. It produces a subtle tang that complements sweet additions like maple syrup or blueberries.
  • Aged discard (one week or older) carries a sharp, vinegar-like acidity and a thin layer of grey liquid on top known as hooch. While you can stir hooch back into the starter for extra punch or pour it off for a milder profile, aged discard weakens gluten structures significantly. This weakening is detrimental to artisan bread, but it is an advantage for delicate pastries, crackers, and tender pancakes.
Temperature also plays a role. While you should never mix cold milk or eggs into melted butter when baking a cake, cold discard works well in cracker dough because cold fat creates a flakier crumb. For pancakes, allowing the discard to sit at room temperature for 15 to 20 minutes allows the chemical leaveners to activate more smoothly.

Shatter-Crisp Sourdough Discard Crackers

Commercial crackers often rely on vegetable oils, emulsifiers, and artificial flavorings to achieve shelf stability and crunch. Homemade sourdough crackers require only three basic elements: discard, fat, and salt.
The natural acid in the discard breaks down tough gluten strands, allowing you to roll the dough paper-thin without it snapping back excessively. As the moisture bakes out, the fat laminates the dough microscopically, yielding a cracker with the delicate snap of a fine tavern biscuit.

The Master Cracker Formula

This ratio scales easily depending on how much discard you have accumulated in your refrigerator.
  • 200 grams sourdough discard (stirred down, unfed)
  • 30 grams unsalted butter, melted and cooled slightly (or 25 grams extra-virgin olive oil)
  • 2 grams fine sea salt (about half a teaspoon)
  • Coarse salt, dried herbs, or cracked pepper for topping

Step-by-Step Method

Begin by combining the discard, melted butter, and fine sea salt in a medium mixing bowl. Stir with a sturdy silicone spatula until the fat is fully incorporated and the mixture forms a smooth, cohesive paste. If your discard was quite runny, you may need to stir in one or two tablespoons of all-purpose flour until it resembles a pliable, soft dough.
Line a large baking sheet with parchment paper. Turn the dough out directly onto the parchment. Lay a second sheet of parchment paper over the dough to prevent sticking. Using a rolling pin, roll the dough outward from the center toward the edges.
The secret to foolproof crackers is even thickness. Aim for roughly one-sixteenth of an inch (1.5 millimeters). If the edges are significantly thinner than the center, they will scorch before the middle crisps up. Once rolled, peel away the top sheet of parchment paper.
Slide the parchment paper with the rolled dough onto your baking sheet. Use a pastry wheel, pizza cutter, or sharp knife to score the dough into one-and-a-half-inch squares. Dock each square once or twice with the tines of a fork to prevent steam bubbles from ballooning the crackers during baking.
Brush the surface lightly with water or olive oil, then scatter your chosen toppings evenly over the surface. Gently press the seasonings into the dough with your palms so they adhere.
Bake at 325°F (165°C) for 25 to 35 minutes. Rotate the pan halfway through the bake. Check the crackers frequently after the 20-minute mark; crackers go from pale gold to burnt very quickly. The crackers are done when the edges are deep golden brown and the centers feel dry and rigid to the touch.
Turn off the oven, prop the door open slightly with a wooden spoon, and let the crackers sit inside for 10 minutes. This gentle ambient heat dries out any remaining moisture without scorching the crust. Remove, cool completely on a wire rack, and break apart along the scored lines.

Flavor Customization

The neutral tang of sourdough makes an ideal backdrop for savory flavor combinations. Consider these kitchen-tested variations:
  • Aged White Cheddar and Smoked Paprika: Fold 30 grams of finely grated sharp cheddar and a half-teaspoon of smoked paprika directly into the dough before rolling.
  • Seeded Everything: Skip internal add-ins, brush the dough with olive oil, and generously coat the surface with equal parts black sesame seeds, white sesame seeds, poppy seeds, dried minced garlic, and flaky sea salt.
  • Rosemary and Olive Oil: Substitute fruity extra-virgin olive oil for the butter, and fold two teaspoons of finely minced fresh rosemary into the dough.

Cloud-Light Sourdough Discard Pancakes

Many sourdough pancake recipes yield flat, rubbery discs because bakers treat discard like a leavening agent. Discard cannot lift heavy pancake batter on its own. Instead, it serves as the ultimate acidic base for a chemical leavening reaction.
When the lactic and acetic acids in sourdough discard meet baking soda, a rapid chemical reaction occurs. Carbon dioxide gas generates immediately, foaming the batter into an airy mousse. When that batter hits a hot griddle, the trapped gas pockets expand rapidly, producing pancakes that are thick, tender, and light.

The Master Pancake Recipe

This recipe makes roughly eight to ten four-inch pancakes, serving three to four people.
  • 240 grams sourdough discard (room temperature preferred)
  • 120 grams all-purpose flour
  • 15 grams granulated sugar
  • 5 grams baking powder (one teaspoon)
  • 3 grams baking soda (half a teaspoon)
  • 2 grams fine sea salt (half a teaspoon)
  • 1 large egg
  • 180 grams whole milk (or buttermilk for extra tang)
  • 45 grams unsalted butter, melted and cooled
  • 5 grams pure vanilla extract (one teaspoon)

Step-by-Step Method

In a large bowl, whisk together the all-purpose flour, granulated sugar, baking powder, baking soda, and salt. Whisking dry ingredients thoroughly ensures the baking soda is evenly dispersed, which prevents pockets of bitter, soapy residue in the finished pancakes.
In a separate medium bowl, whisk together the sourdough discard, milk, egg, melted butter, and vanilla extract until completely smooth.
Pour the wet mixture into the dry ingredients. Use a wide spatula to fold the batter together using gentle, sweeping strokes. Do not overmix. Stop as soon as the flour pockets disappear; the batter should remain noticeably lumpy. As you fold, you will see the batter visibly puff and foam as the discard’s acid reacts with the baking soda. Let the batter rest undisturbed for five minutes while you heat your pan.
Preheat a heavy cast-iron skillet or griddle over medium heat until a drop of water skitters across the surface and evaporates. Lightly coat the cooking surface with a small amount of neutral oil or clarified butter (regular butter contains milk solids that burn during extended pancake sessions).
Drop one-third cup of batter onto the hot griddle for each pancake. Cook until the underside turns a deep golden brown and bubbles form across the surface, roughly two to three minutes. Because this batter is exceptionally thick and airy, look for bubbles that burst and leave open craters at the edges before flipping.
Slide a thin spatula cleanly underneath the pancake and flip in one swift motion. Cook the second side for another one to two minutes until lightly browned and cooked through the center. Serve immediately, or keep the finished batch warm in a 200°F (95°C) oven on a wire-rimmed baking sheet while you cook the remainder.

Perfecting the Pancake Crumb

If your pancakes turn out gummy in the middle, the culprit is almost always stove heat that is set too high. The sugar and acid in sourdough batter cause it to brown faster than standard pancake batter. If the heat is aggressive, the exterior caramelizes before the interior starch gelatinizes. Lower the burner slightly and allow the pancakes to cook slowly so the interior crumb sets properly.
If you enjoy additions like fresh blueberries or chopped toasted pecans, drop them directly onto the raw, bubbling tops of the pancakes while they cook on their first side rather than stirring them into the main mixing bowl. This prevents the delicate, airy batter from deflating during the fold.

Storing Discard and Managing Baking Workflow

Getting the most out of sourdough discard comes down to storage hygiene. Keep a clean, airtight glass container dedicated solely to discard in your refrigerator. Whenever you feed your mother starter, pour the surplus directly into this jar. Discard kept chilled in this manner remains safe and usable for up to three weeks.
If liquid collects on top of your discard, inspect it. Clear or light amber liquid is normal hooch and can be stirred back in or poured off. If the liquid turns pink, orange, or shows any signs of mold, discard the entire contents and sanitize the jar before restarting.
Crisped crackers should be cooled completely to room temperature before being transferred to an airtight glass container or metal tin. Stored in a dry pantry away from direct heat, they retain their crispness for up to two weeks. If they begin to soften due to ambient humidity, arrange them on a baking sheet and refresh them in a 300°F (150°C) oven for five minutes.
Pancakes freeze exceptionally well. Allow leftover pancakes to cool completely, stack them with small squares of parchment paper between each layer, and seal them inside a freezer-safe silicone or plastic storage bag. Reheat them directly from frozen in a standard toaster on a medium setting; the toaster warms the interior while restoring the delicate crispness of the outer crust.
Sourdough discard baking is not about cutting corners or settling for second-best textures. With the right technique, these recipes turn everyday baking surplus into staple items that stand firmly on their own culinary merits.
read more
Food

Master the Crust: Essential Techniques for the Ultimate Steak Sear

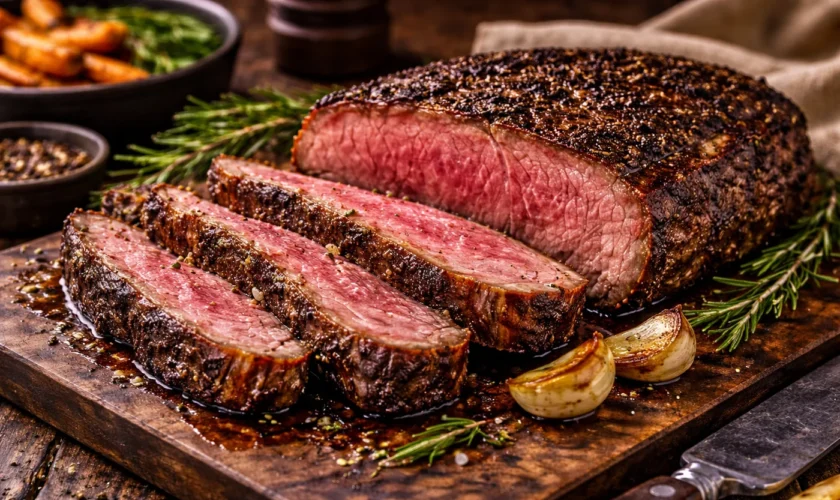
Achieving a steakhouse-quality sear at home is often treated as a culinary mystery, yet it relies entirely on predictable physical and chemical principles. The contrast between a deeply caramelized, savory crust and a tender, rosy interior is the hallmark of great steak cookery. When executed correctly, a proper sear delivers a crunch that yields to juicy tenderness, elevating the natural flavor of the beef.
Too often, home cooks end up with a disappointing compromise: an uneven, grayish-brown surface accompanied by a thick, rubbery ring of overcooked meat beneath the crust, commonly known as the gray band. Alternatively, cooks burn the exterior while the interior remains cold and raw. Overcoming these hurdles does not require commercial kitchen equipment, but it does demand an understanding of thermal transfer, surface moisture, and fat dynamics.

Cut Selection and the Importance of Thickness

A legendary sear begins at the butcher counter. The physical dimensions of the steak dictate how aggressively you can apply heat to the exterior without overcooking the center.
Steaks cut thinner than an inch and a half pose a serious mechanical challenge. Because heat moves rapidly through meat, a thin cut will reach medium or well-done before the surface has had enough time to undergo proper caramelization. For pan-searing, aim for a cut that is at least one and a half to two inches thick. Cuts like ribeye, New York strip, and thick-cut porterhouse provide the thermal buffer required to build a dark, textured crust while preserving a medium-rare core.
Marbling also plays a foundational role in thermal conduction. Lean cuts like tenderloin contain minimal intramuscular fat, meaning they rely almost entirely on external cooking oils for heat transfer. Highly marbled cuts, such as prime-grade ribeyes, render internal fat as they heat. This rendered beef tallow bastes the muscle fibers from within and promotes a rich, uniform exterior crunch. If your steak features a thick exterior fat cap, trim it down to roughly a quarter of an inch. Leaving too much fat invites curling during cooking, which lifts the meat off the pan surface.

Eradicating Surface Moisture

Moisture is the absolute enemy of the sear. When meat hits a hot skillet, the browning you seek is driven by the Maillard reaction, a complex cascade of chemical reactions between amino acids and reducing sugars. The Maillard reaction occurs rapidly only at temperatures above 300 degrees Fahrenheit.
Water, however, cannot exceed 212 degrees Fahrenheit at sea level in an open pan. If the exterior of your steak is wet, all the thermal energy from the pan goes into boiling off surface water instead of searing the meat. In effect, the steak steams in its own juices until the liquid evaporates, leaving behind a dull gray exterior.

The Dry-Brine Method

The most effective technique for banishing surface moisture is an extended dry brine in the refrigerator:
  • Place the steak on a wire cooling rack set inside a rimmed baking sheet.
  • Season all sides generously with kosher salt.
  • Transfer the uncovered steak to the refrigerator for a minimum of twelve hours, and ideally up to twenty-four hours.
During this resting period, the salt initially draws moisture out of the meat through osmosis. As the salt dissolves in these surface juices, it creates a concentrated brine that gradually breaks down muscle proteins, allowing the seasoned liquid to be drawn back deep into the tissue. Meanwhile, the circulating, dehumidified air of the refrigerator evaporates any remaining surface water. The result is a bone-dry, deeply reddish exterior known as a pellicle, which caramelizes almost instantaneously when it touches a hot cooking surface.
If time does not allow for an overnight dry brine, dry the meat manually. Use multiple changes of paper towels, pressing firmly against all surfaces, including the sides, until the paper pulls away completely dry.

Salting Dynamics and Timing

When you salt your steak matters just as much as how much salt you use. Salting creates an osmotic reaction that changes the surface chemistry of the meat over time.
There are two optimal windows for salting a steak. The first is at least forty-five minutes before cooking, though twelve to twenty-four hours is far superior. Forty-five minutes gives the salt enough time to draw moisture out, dissolve, and reabsorb back into the interior.
The second acceptable window is immediately before the steak hits the pan, within thirty seconds of cooking. Salting right before cooking seasons the exterior without giving the salt crystals enough time to pull liquid out of the muscle fibers.
The worst mistake is salting a steak ten to fifteen minutes before cooking. Within this window, the salt has pulled water to the surface, but the liquid has not yet had time to reabsorb. Placing a steak in this state into a hot pan guarantees an aggressive drop in pan temperature and unwanted steaming.

Cookware Selection and Thermal Mass

The pan you choose directly influences how heat transfers into the meat. Lightweight nonstick pans have no place in high-heat searing. Nonstick coatings degrade and release harmful fumes at high temperatures, and thin pans lack the mass required to hold heat when a cold slab of beef is introduced.
Reach for heavy-gauge cast iron, carbon steel, or thick clad stainless steel. These metals boast high volumetric heat capacity. While cast iron heats relatively slowly and can develop hot spots, its immense mass acts as a heat battery. When an eight-ounce or twelve-ounce steak touches the iron, the skillet does not experience a dramatic drop in temperature. It maintains the intense heat necessary to flash-sear the surface instantly.
Preheat your skillet over medium to medium-low heat for eight to ten minutes rather than blasting it on high for two minutes. A slow preheat ensures the heat saturates the entire thickness of the metal, eliminating cold spots and providing an even, radiant cooking zone across the entire base of the pan.

Choosing the Right Cooking Fat

Using the wrong fat can ruin a sear by introducing acrid, burnt notes before the meat develops a balanced crust. Fats with low smoke points break down quickly under intense heat, releasing bitter chemical compounds and filling your kitchen with choking smoke.
Avoid whole butter, unrefined olive oil, and extra virgin oils for the primary searing phase. Whole butter contains roughly sixteen to eighteen percent water and several percent milk solids. The water encourages steaming, while the milk solids scorch and turn bitter at temperatures above 350 degrees Fahrenheit.
Instead, select cooking fats with high smoke points and clean flavors:
  • Avocado Oil: Smoke point around 520 degrees Fahrenheit; neutral flavor.
  • Clarified Butter or Ghee: Smoke point around 485 degrees Fahrenheit; delivers rich buttery notes without milk solids that burn.
  • Rendered Beef Tallow: Smoke point around 400 degrees Fahrenheit; reinforces the natural beefy richness of the cut.
  • Grapeseed Oil: Smoke point around 420 degrees Fahrenheit; clean, affordable, and widely available.
Apply the fat directly to the steak rather than pouring a pool of oil into the pan. Lightly rubbing a thin sheen of oil over the salted meat ensures uniform thermal contact and prevents the oil from smoking needlessly on exposed areas of the hot iron.

Maximizing Surface Contact and Pressure

A pan can only sear the meat it physically touches. Raw steaks rarely feature a perfectly flat plane; muscle fibers contract under heat, causing the edges to curl and creating air pockets beneath the meat. Since air is an exceptionally poor heat conductor compared to hot metal, these elevated spots remain pale while adjacent areas brown.
To guarantee complete contact, place the steak in the hot skillet and immediately apply firm, even pressure across the top using a stiff spatula, a grill press, or a small cast-iron weight. Maintain this pressure for the first thirty to forty-five seconds of cooking. This initial press anchors the meat against the pan while the exterior proteins set, locking in a flat profile.
If your steak has a significant strip of fat or connective silverskin along the edge, score it every inch and a half with a sharp knife before cooking. Scoring cuts through the contracting connective tissue, preventing the steak from cupping like a shallow bowl as it cooks.

The Case for Frequent Flipping

Traditional culinary dogma insisted that a steak should only be flipped once during cooking. Modern food science has soundly dismantled this rule.
Flipping a steak only once forces one side to endure continuous high heat for several minutes. While this eventually creates a crust, it drives a deep wave of excessive heat into the interior, resulting in a wide, gray band of overcooked meat surrounding a small core of pink.
Flip your steak frequently, roughly every thirty to forty-five seconds. Frequent flipping provides distinct mechanical advantages:
  • Neither side spends enough time against the metal to scorch.
  • The side facing upward cools slightly, preventing heat from penetrating too aggressively into the center.
  • Surface moisture evaporates continuously as each side is exposed to air, accelerating crust formation.
  • Cooking time decreases by roughly twenty to thirty percent because both sides absorb heat in rapid, alternating pulses.
The result of frequent flipping is a crisp, deeply browned crust flanking an edge-to-edge medium-rare interior with virtually no gray ring.

The Finishing Butter Baste

While whole butter should never be used to start a sear, it plays an indispensable role at the end of the cooking process through the classic technique known as arrosé, or butter-basting.
When the internal temperature of your steak sits roughly fifteen degrees below your final target, drop the heat to medium-low. Add two to three tablespoons of unsalted butter to the pan along with smashed garlic cloves, fresh rosemary, and thyme sprigs. As the butter melts, tilt the skillet slightly toward you so the melted fat pools along the bottom edge.
Using a large metal spoon, continuously scoop the foaming butter and cascade it over the top of the steak. The foaming milk solids gently brown in the hot fat, imparting a nutty aroma while flowing into every micro-crevice of the meat. This process builds a complex secondary layer of flavor, enhances the deep mahogany color, and perfumes the steak with the aromatics without burning them.

The Reverse Sear for Extra-Thick Cuts

For steaks measuring two inches or thicker, the standard pan-searing method can struggle to cook the center without over-caramelizing the exterior. In these scenarios, the reverse sear technique is the gold standard.
Instead of searing first and finishing in the oven, reverse the order. Place your salted, dry-brined steak on a wire rack in an oven preheated to a low temperature, between 225 and 250 degrees Fahrenheit. Allow the steak to warm gently until its core reaches roughly 110 to 115 degrees Fahrenheit for medium-rare.
This slow, gentle warmup yields two major benefits. First, it brings the interior to an even temperature from center to edge. Second, the dry, warm oven air completely dehydrates the surface of the meat.
Once removed from the oven, the steak is placed into a blisteringly hot cast-iron skillet with a thin film of beef tallow or high-smoke-point oil. Because the surface is warm and completely free of moisture, a dark, shattering crust forms in just forty-five to sixty seconds per side, eliminating the risk of overcooking the core.

Resting and Managing Post-Cook Vapor

Your work is not finished when the steak leaves the pan. How you handle the meat during the resting phase directly dictates whether your crust survives until the first bite.
Never transfer a freshly seared steak to a flat plate or a smooth cutting board. As the hot meat rests, moisture vapor continues to escape from the bottom surface. On a flat plate, this vapor has nowhere to go; it condenses against the ceramic surface and pools directly beneath the steak, rapidly turning your hard-earned crust into a soggy, wet mess.
Instead, rest the steak on a clean wire cooling rack for five to eight minutes. Resting on an elevated wire grid allows air to circulate beneath the meat, keeping the bottom crust crisp while the internal muscle fibers relax and reabsorb their juices.
Carve the steak across the grain with a sharp, non-serrated slicing knife to ensure optimal tenderness. Right before serving, sprinkle the cut slices with coarse, flaky sea salt. The large, delicate salt crystals provide a clean burst of mineral crunch that cuts through the rich fat and emphasizes the complex savory notes of the sear.
Mastering the steak sear is a craft defined by disciplined preparation rather than culinary luck. By eliminating moisture, harnessing high thermal mass, respecting fat behavior, and abandoning outdated cooking myths, you can reliably produce steaks that rival the finest chophouses in the country.
Meta Title: Essential Cooking Tips for Achieving the Ultimate Steak Sear
Meta Description: Learn how to achieve a perfect, steakhouse-quality sear at home with expert tips on moisture control, pan selection, flipping methods, and butter basting.
read more
Featured

Master the Heat: Safe Temperature Control for Flawless Home Deep Frying

Deep frying has an unearned reputation in home kitchens as a chaotic, messy, and inherently greasy cooking method. Many home cooks approach the process with hesitation, imagining clouds of acrid smoke, splattering oil across countertops, and food that turns out heavy and sodden. Yet, when executed with precision, deep frying is one of the cleanest, fastest, and most chemically elegant ways to cook.
The secret to restaurant-quality fried food does not lie in commercial-grade equipment or guarded batter recipes. It rests entirely on understanding and controlling thermal dynamics. Deep frying is fundamentally a dehydration process that uses hot liquid fat as a rapid, uniform heat-transfer medium. The extreme heat flash-cooks the surface of the food, turning internal water into pressurized steam. This steam pushes outward through the crust, preventing the cooking oil from soaking into the food while cooking the interior to tender perfection.
When your oil temperature is dialed in, food emerges remarkably light, crisp, and grease-free. When temperature control slips, however, that outward vapor pressure collapses, and the oil floods the interior of your food, resulting in a soggy, oily failure. Mastering the heat ensures both culinary excellence and total kitchen safety.

Selecting the Right Fat: Smoke Points and Thermal Stability

Your journey toward temperature control begins with the oil you pour into the pot. Cooking fats behave very differently under sustained, high-heat conditions. Choosing an improper oil sabotages your cook before you even turn on the burner.
Every cooking fat has a specific smoke point—the temperature at which the volatile compounds within the oil begin to break down, produce visible smoke, and release bitter, acrid flavors along with free radicals. For deep frying, which typically requires sustained heat between 325 and 375 degrees Fahrenheit, you need an oil with a smoke point well above 400 degrees.
Refined peanut oil remains the gold standard for home frying due to its 450-degree smoke point, neutral flavor profile, and outstanding heat stability. If peanut allergies are a concern, refined canola oil, safflower oil, and corn oil serve as accessible, dependable alternatives with high smoke points and minimal flavor transfer.
For cooks seeking richer, traditional profiles, rendered beef tallow or lard offers extraordinary thermal stability. Because animal fats consist predominantly of saturated and monounsaturated fatty acids, they resist oxidation and thermal degradation far better than delicate polyunsaturated seed oils.
Never use extra virgin olive oil, unrefined seed oils, or whole butter for deep frying. These fats contain water, free fatty acids, and unrefined proteins that burn aggressively at temperatures as low as 320 degrees Fahrenheit, creating noxious fumes and ruining both the food and the kitchen air.

Essential Gear for Precision and Thermal Stability

Attempting to deep fry without accurate temperature measurement is essentially gambling. Relying on folklore—such as watching for tiny bubbles around the handle of a submerged wooden spoon—is dangerously misleading. Water inside wood will bubble at 212 degrees Fahrenheit, which is well below the minimum threshold required for frying.

Dedicated Thermometers Versus Visual Cues

A reliable thermometer is your primary control mechanism. An analog, stainless steel clip-on candy and deep-fry thermometer is an inexpensive, durable choice. It fastens directly to the lip of the pot, keeping the probe suspended in the middle of the oil bath without touching the conductive metal floor of the pan.
For even greater accuracy, use a digital probe thermometer equipped with a high-heat cable and an adjustable temperature alert. Setting an alarm five degrees below your target allows you to adjust the flame before the oil overshoots its mark.
Avoid relying on handheld infrared laser thermometers. While infrared devices excel at reading surface temperatures on a cast-iron skillet, they only measure the reflective, uppermost sheen of a liquid fat bath, often reading ten to twenty degrees cooler than the convective oil circulating beneath the surface.

Choosing the Proper Vessel for Heat Retention

The pot you choose dictates how resilient your oil bath will be against sudden temperature drops. Thin, lightweight aluminum or nonstick saucepans are dangerous choices for deep frying. They lose heat instantaneously when cold food is added, and their thin walls develop scorching hot spots that degrade the oil.
Reach instead for a heavy enameled cast-iron Dutch oven or a heavy-gauge, multi-clad stainless steel pot. Thick cast iron boasts high thermal mass, acting like an energy reservoir that absorbs heat from the burner and steadily radiates it into the oil.
Furthermore, pot geometry is critical for safety. Never fill any pot more than halfway with oil, and ideally keep it to one-third full. As food is lowered into the fat, moisture rapidly expands into foam, raising the liquid level significantly. Maintaining at least three to four inches of clearance between the surface of the oil and the top rim of the pot provides the headroom needed to prevent dangerous boil-overs.

Navigating the Temperature Drop: The Science of Batch Management

The most challenging phase of temperature control occurs the second raw food enters the vessel. Introducing a pound of refrigerator-cold chicken thighs or chilled, battered fish into four quarts of hot fat creates an immediate thermal shock.
Depending on the volume of food and oil, your bath temperature can easily plummet by 30 to 60 degrees within fifteen seconds. If the oil drops below 300 degrees, the bubbling steam slows down, the crust fails to set rapidly, and the food begins to absorb fat like a sponge.
To counter this inevitable drop, utilize compensatory heating. If your target cooking temperature is 350 degrees, heat the oil to 365 or 370 degrees before adding the food. As soon as the ingredients enter the pot, the temperature will drop directly into your desired 350-degree cooking pocket.
At the exact moment you drop the food, proactively raise your stove burner by a notch or two to fight the incoming cold mass. Once the bubbling stabilizes and the thermometer confirms the oil has plateaued at your target range, dial the burner back down to maintain steady equilibrium.
Equally important is resisting the temptation to overcrowd the pot. Frying in small, disciplined batches is essential. Crowding too many cold items into the vessel drops the temperature so low that the burner cannot recover before the food is ruined. A useful rule of thumb is to ensure that floating items have enough room to bob freely without touching or stacking on top of one another.

Managing Surface Moisture and Splatter Hazards

Water and hot oil do not mix, and understanding this physical boundary is fundamental to deep-fry safety. Water boils at 212 degrees Fahrenheit. Cooking oil operates more than a hundred degrees hotter. When liquid water contacts 350-degree oil, it vaporizes instantaneously, expanding into steam by roughly 1,600 times its original volume. This violent volumetric expansion throws atomized hot fat into the air, generating explosive pops, splatters, and potential grease fires.
Controlling your cook requires aggressive moisture management on the surface of your ingredients:
  • Dry Proteins Thoroughly: Pat raw meats, poultry, and potatoes aggressively with paper towels before breading or dropping them into the oil.
  • Embrace the Chill and Air-Dry: For items like chicken wings or french fries, letting them sit uncovered on a wire rack in the refrigerator for a few hours dries the outer skin, creating a barrier that yields superior crunch without violent bubbling.
  • Sift Away Loose Breading: Excess dry flour, cornstarch, or breadcrumbs that fall off food will sink to the bottom of the pot, burning into bitter charcoal and clouding the oil. Shake off excess coatings using a wire mesh strainer before frying.
  • Clear Ice Crystals: Never drop frozen food with surface frost into hot oil. Knock off all visible ice crystals outside the pot before gently lowering the items into the fat.
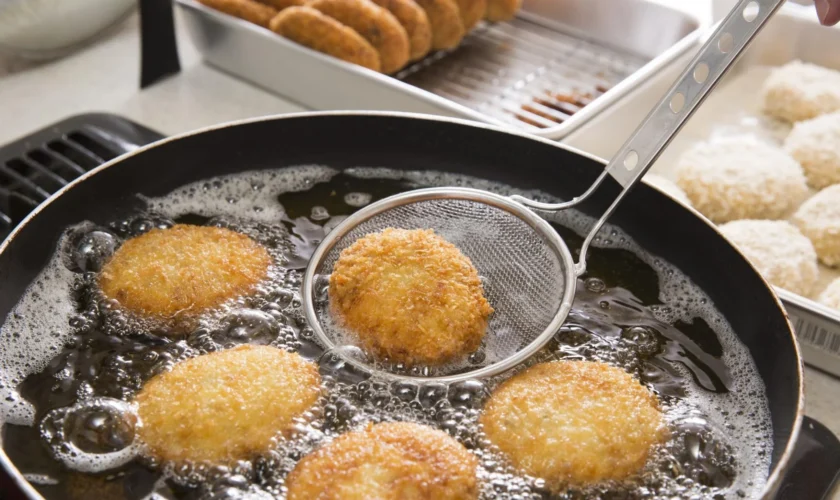
When adding food to the pot, always lower it away from your body using a wire spider strainer, metal tongs, or a slotted spoon. Dropping food straight down from your fingers causes splashing that can burn your hands or ignite on the burner below.

Recovery Time: The Forgotten Step in Multi-Batch Cooking

One of the most frequent mistakes made by home cooks happens between batches. After pulling a gorgeous, golden batch of tempura or hushpuppies from the pot, the natural instinct is to drop the next portion immediately.
Doing so is a recipe for greasy, undercooked food. Pulling food out leaves the oil at a depleted temperature, and introducing fresh, cold ingredients without pausing drives the heat down even further.
Between every single batch, you must observe recovery time. Allow the oil to sit undisturbed over medium heat until the thermometer climbs back up to your target temperature—plus the compensatory cushion needed for the drop.
During this brief window, use a fine-mesh skimmer to scoop out any floating crumbs, stray batter beads, or sediment lingering on the surface or bottom of the oil. Removing these particulates prevents them from burning, which preserves the clean flavor of the fat and extends the usable life of the oil for subsequent batches.

Recognizing Degradation and Safe Post-Fry Management

Cooking oil is an organic material that degrades through heat, oxidation, and contact with water and food particles. As oil breaks down through repeated heating, its chemical structure changes, causing its smoke point to drop steadily.
Knowing when oil has reached the end of its lifespan is vital for both food flavor and safety. Discard your oil if you observe any of the following warning signs:
  • The oil turns noticeably dark, viscous, or syrupy.
  • A persistent, soapy-looking foam forms on the surface and refuses to dissipate.
  • The oil begins smoking well before reaching standard frying temperatures.
  • The aroma turns acrid, fishy, or rancid, even before food is introduced.
Once cooking is complete, turn off the burner immediately and slide the pot to a cool, unlit burner. Hot oil retains immense heat and can take several hours to cool down to room temperature safely. Never attempt to move, pour, or filter a pot of hot oil.
Once completely cool, strain the oil through a fine-mesh sieve lined with a coffee filter or cheesecloth into an airtight container. Store it in a cool, dark cupboard for future use. If disposing of old oil, never pour it down the sink drain, where it solidifies and causes severe plumbing blockages. Pour it into a sealed, non-recyclable container, such as an empty coffee tin or milk carton, and place it directly into the household trash.

Essential Fire Safety Protocols

Even the most careful cook must know how to respond instantly in the unlikely event of an equipment failure or grease fire. A grease fire occurs when oil is heated past its flash point, allowing vapors to ignite.
The absolute golden rule of deep frying is: never use water on a grease fire. Pouring water onto burning oil causes the water to sink, superheat, vaporize into steam, and violently blast burning fat across the kitchen in a massive fireball.
If your oil catches fire, stay calm and take immediate, decisive action. Turn off the heat source if you can safely reach the dial. Slide a flat metal baking sheet or a tight-fitting metal pot lid over the pot to starve the flame of oxygen. You can also smother small grease flares with generous amounts of baking soda or salt. Never use flour, cornstarch, or baking powder, as airborne starches can combust. Keep a functioning Class B or dry-chemical kitchen fire extinguisher accessible in your kitchen whenever you fry.
Deep frying at home should never be an unpredictable, high-stress endeavor. By investing in heavy cookware, monitoring temperatures with accurate probes, respecting batch sizes, and managing moisture, you transform frying from an intimidating challenge into a precise, repeatable craft that produces stunning culinary results every time.
read more
Food

Practical Strategies for Cutting Food Waste in Independent Bakeries

Running an independent bakery requires balancing hospitality with tight operational discipline. Every morning, bakers strive to present a display case that looks bountiful, vibrant, and welcoming. Yet every evening, many operators face the disheartening sight of unsold loaves, hardened baguettes, and delicate pastries destined for the trash can. In a business where ingredient costs fluctuate unpredictably and labor remains intensely demanding, throwing away finished product is equivalent to throwing away margin.
Food waste in retail bakeries rarely stems from a single catastrophic mistake. Instead, it accumulates through subtle leaks across the production cycle: misjudged prep yields, rigid baking schedules, flawed inventory assumptions, and an outdated belief that display cases must remain overflowing until the final customer walks through the door. Turning the tide on bakery waste does not require sacrificing product quality or disappointing your morning rush. It calls for systematic measurement, flexible production rhythms, and an intentional approach to how food moves through your kitchen.

Auditing the Bins to Locate Hidden Shrinkage

Before you can fix waste, you must identify its true origins. Many operators lump all food loss into a single mental category called leftovers. In reality, bakery waste divides into two distinct categories: back-of-house production loss and front-of-house retail loss. Each demands a completely different remedy.
Back-of-house waste happens at the prep table, mixer, and oven. It includes over-trimmed laminated dough, dough that over-proofed during an unexpected shift delay, burned sheet pans, or batter clinging to mixing bowls because staff rushed through portioning. Front-of-house waste, by contrast, consists of pristine, finished products that simply failed to sell before passing their sensory peak.
To isolate these losses, set up a simple daily waste log next to your dish pit and prep tables. Require your team to record waste by category, weight, and item count before anything hits the dumpster. A container of discarded croissant dough scrap represents lost butter, flour, and initial prep labor, but it does not carry the baking energy or display costs of an unsold finished croissant. Tracking both figures for two to three weeks reveals clear patterns. You may discover that your Tuesday sourdough discard is driven by overproduction, while your Friday scone waste stems from irregular portioning that leaves pieces looking unmarketable.

Distinguishing Production Error from Forecasting Error

When an entire tray of brioche buns comes out pale or collapsed, that is an execution issue requiring recipe recalibration, oven maintenance, or staff training. When twelve perfect brioche buns sit in the display case at closing time, that is a forecasting failure. Separating these two operational metrics keeps management conversations constructive. It prevents bakers from feeling blamed for market shifts and stops front-of-house staff from feeling responsible for recipe inconsistencies.

Modernizing Par Levels and Production Schedules

Traditional retail baking relied on massive early-morning bakes. Bakers arrived at two in the morning, filled every shelf by seven, and accepted whatever remained at five in the afternoon as an inevitable cost of doing business. Today, successful bakeries avoid this all-or-nothing approach by adopting dynamic par levels and phased production.
Dynamic par levels abandon the notion of fixed weekly templates. Instead of baking forty baguettes every weekday, look closely at external factors that influence foot traffic: local school schedules, rain forecasts, payday weekends, and neighboring business activity. If bad weather is forecast for a Thursday afternoon, drop production by twenty percent. If a nearby community event is scheduled for Saturday, shift pastry production up while keeping artisan loaves relatively stable.
Phased baking spreads risk throughout the day. Instead of baking your entire inventory before sunrise, hold unbaked, shaped items in cold retarders. Laminated pastries, cookies, and certain rustic breads handle chilled holding exceptionally well. By baking an initial sixty percent of your projected volume for the morning rush, your counter stays stocked with fresh product. As noon approaches, counter staff can assess traffic and instruct the bake-off team to fire remaining pans only if demand warrants it. If foot traffic drops off unexpectedly, those unbaked items can remain safely refrigerated or frozen for the following morning, completely eliminating the waste of a finished product.

Upcycling Day-Old Bakes into High-Margin Signatures

Repurposing surplus bakes is not a desperate salvage mission; it is one of the oldest, most celebrated traditions in classical baking. Some of the most beloved bakery items across the globe were created specifically to give day-old bread and pastry a second, more profitable life.
Baguettes and lean hearth loaves that lose their crust crunch after twenty-four hours remain packed with developed flavor. Slice them thinly on an electric meat slicer, brush them with olive oil, sprinkle with sea salt, and bake them into crostini or garlic crisps. Packaged in clear bags with custom labels, these items offer extended shelf lives of several weeks and boast an extraordinarily high gross margin.
Stale sandwich loaves and brioche make superior bases for bread pudding, French toast bakes, and savory strata. Bread crumbs dried thoroughly in a cooling oven can be seasoned and sold directly to customers as premium panko-style coatings, or used internally as binders in bakery cafe soups and savory pie fillings.
Laminated pastries lend themselves naturally to twice-baked preparations. Day-old plain croissants, which have dried out slightly, absorb sugar syrups without turning to mush. Split them, soak them lightly in simple syrup flavored with orange blossom or rum, fill them with almond frangipane, and bake them a second time. Customers regularly pay a premium for almond or chocolate-almond croissants, transforming yesterday’s unsold liability into today’s top-tier revenue driver.
Dough scraps from laminating and shaping can also be diverted from the bin. Trimmings from puff pastry or croissant blocks can be layered with cinnamon sugar, rolled tightly, and sliced into morning buns or savory cheese straws. These additions expand your menu without requiring an ounce of newly purchased flour or butter.

Rethinking Visual Merchandising and the Abundance Fallacy

For decades, the grocery and retail bakery industries operated under the belief that customers only purchase from overflowing displays. This idea, known as the illusion of abundance, leads shop owners to overproduce intentionally simply so the pastry case looks full at four in the afternoon.
Modern consumer psychology has shifted noticeably. Today’s customers increasingly equate overflowing display cases late in the day with stale goods and wasteful business practices. Conversely, a carefully curated, sparse case conveys that your products are fresh, highly sought after, and baked in limited quantities.
You can create the impression of a vibrant showcase without stocking dozens of perishable items. Use physical merchandising techniques to adjust case capacity:
  • Use smaller porcelain trays, elevated risers, and wooden crates rather than massive full-sheet pans.
  • Incorporate decorative elements, such as jars of unground grains, dried flowers, or artisanal pantry goods, to occupy empty shelf space gracefully as afternoon sales clear out stock.
  • Group remaining items together on a single focal shelf rather than leaving two lonely muffins scattered across a vast, empty tray.
Train your front-of-house staff to turn diminishing inventory into an asset. When a customer arrives at three in the afternoon to find only three sourdough loaves remaining, your counter staff should not apologize for the lack of variety. Instead, they can frame it positively: “We had a busy morning, and these are the last three loaves from today’s bake.” Scarcity creates genuine purchase urgency and reinforces the quality of your craft.

Managing Late-Day Inventory and Community Outlets

Even with meticulous forecasting and creative upcycling, every bakery occasionally ends the day with surplus perishables. The goal is to build clear, reliable secondary channels so these items never enter the waste stream.
End-of-day discounts require careful handling. If you announce a blanket fifty percent discount every day at four o’clock, price-sensitive customers will alter their habits, delaying their purchases and cannibalizing your full-price midday revenue. A more effective tactic is offering unadvertised, targeted incentives: bundling remaining bread loaves with a soup purchase, or slipping a free pastry into the bag of an afternoon regular.
For surplus that cannot be sold over the counter, utilize surplus redistribution platforms and direct community partnerships. Digital surplus apps allow bakeries to package remaining baked goods into surprise bags sold at a reduced price near closing time. This recovers basic ingredient costs and introduces your brand to prospective new customers who may return later for full-priced orders.
Establish a disciplined donation routine with local shelters, community pantries, or soup kitchens. The key to a successful donation partnership is consistency and logistical simplicity. Arrange for a dedicated organization to pick up packaged day-old items on specific mornings each week, or designate a staff member to drop them off along their commute. Knowing surplus is feeding people in your immediate neighborhood turns inevitable production variances into community goodwill.

Building a Culture of Kitchen Efficiency

Software tools, inventory formulas, and creative recipes are useless if your kitchen team does not share an active commitment to waste reduction. Bakers and apprentices often work under severe time pressure, making it tempting to discard dough scrap or scrape batter into the trash rather than taking the extra thirty seconds to clean down a bowl thoroughly.
Engage your culinary team by making waste visible and measurable. Share monthly ingredient invoices with your head baker and shift leaders so they understand the financial reality of butter and specialty flour costs. When staff see that reducing daily scrap by ten percent frees up budget for new kitchen equipment, higher bonuses, or wage increases, waste reduction stops feeling like an administrative chore and becomes a collective goal.
Celebrate kitchen thrift. Recognize bakers who consistently hit precise portioning targets, invent clever uses for kitchen trim, or refine sourdough discard recipes into delicious crackers. When a culture of pride replaces an attitude of indifference, waste reduction becomes an integral part of your bakery’s professional identity.
Operating a profitable small bakery does not require accepting heavy daily waste as the cost of doing business. By tracking production losses, shifting to flexible bake-off schedules, upcycling day-old stock with culinary creativity, and rethinking display habits, independent bakeries can protect their bottom line while honoring the ingredients and labor that make craft baking worthwhile.
read more
Catering

Calculating Catering Staff Ratios: How Many Servers Does Your Event Actually Need?

Few elements can make or break an event faster than the ratio of service staff to guests. When a catering team is understaffed, the consequences ripple across the entire room: drinks sit empty at the bar, cleared plates pile up on dining tables, dinner service stretches past the scheduled timeline, and food arrives lukewarm. Conversely, overstaffing inflates labor costs, erodes catering margins, and clutters the floor with idle crew members getting in the way of guests and photographers.
Determining the ideal staffing count is not as simple as applying a universal formula. While industry shorthand often defaults to basic rules of thumb, seasoned banquet managers and event producers know that service style, venue architecture, beverage complexity, and event pacing fundamentally alter labor requirements. Getting your numbers right requires looking beneath surface headcount and examining how physical logistics and guest expectations intersect on event day.

Service Style as the Baseline for Staffing

The method used to deliver food to the table establishes the primary baseline for your front-of-house roster. Each service format imposes different physical demands on the staff, shifting the balance between front-facing hospitality and back-of-house support.

Plated Dinners

Plated meals demand the highest server-to-guest ratios because every attendee expects their course delivered within a narrow window. A delay of ten minutes between table one and table twenty turns what should be a cohesive dining experience into a disjointed ordeal.
For standard three-course plated dinners, the industry standard sits at one server for every 10 to 12 guests, which translates roughly to one server per ten-top table. This allows a server to handle bread service, pour water, deliver entrees, and clear chargers without feeling hurried.
If the client requests white-glove, synchronized service where every dish at a table is placed down at the exact same second, that ratio tightens substantially. Synchronized service typically requires one server for every 6 to 8 guests. In this setup, servers operate in tandem pairs, with dedicated runners feeding plates continuously from the hot line so floor staff never leave their assigned zones.

Buffet Service

Clients often assume that buffets require minimal labor because guests serve themselves. While kitchen plating labor decreases, floor maintenance and guest support responsibilities rise.
A reliable ratio for standard buffet dining is one server for every 25 to 30 guests. These staff members do not simply stand by; they are responsible for:
  • Monitoring chafer temperatures and swapping hotel pans before food runs low.
  • Wiping down drip edges and keeping carving and sauce stations pristine.
  • Pouring table water and tending to beverage refills throughout the meal.
  • Bus-running used plates, silverware, and glassware as soon as guests return for second visits.
If a buffet features attended carving stations, pasta action stations, or customized toss stations, plan for at least one dedicated culinary attendant per station in addition to the floor server count.

Family-Style Service

Family-style dining has surged in popularity because it combines the seated comfort of a plated meal with the communal atmosphere of a shared table. However, it is deceptively labor-intensive.
Heavy, heated platters and bowls must be carried to tables simultaneously, requiring careful spatial coordination so guests have room for their glassware, floral arrangements, and individual settings. Furthermore, servers must retrieve large platters once emptied to keep tables from feeling overwhelmed.
For family-style service, allocate one server for every 12 to 15 guests. Anything less leads to bottlenecks at the kitchen pass and leaves tables covered in empty, sauce-streaked ceramicware long after the food is consumed.

Passed Hors d’oeuvres and Cocktail Receptions

During cocktail hour, the dynamic shifts from seated service to fluid movement. Guests mingle across the room, creating shifting clusters that servers must navigate with loaded trays.
For light hors d’oeuvres, plan for one server per 25 to 30 guests. If the reception serves as a cocktail-style dinner replacement with substantial, continuous bites, tighten the ratio to one server per 20 guests. Additionally, always schedule dedicated floor bussers whose sole job is circulating with trays to collect discarded skewers, cocktail napkins, toothpicks, and empty glasses from high-top tables and lounge areas.

Factoring in the Hidden Backbone: Support Staff

Focusing solely on table servers overlooks the back-of-house engine that keeps service moving. A floor team cannot execute smoothly if they have to leave their sections to wash glasses, scrape plates, or hunt down hot entrees in the kitchen.

Food Runners

Food runners serve as the high-speed link between the executive chef on the plating line and the floor servers stationed in the dining room. By utilizing dedicated runners, floor servers remain in their assigned sections, attending to water glasses, pouring wine, and engaging guests.
For seated events over seventy-five guests, schedule one runner for every two to three floor servers. When serving large banquets in spaces with long transit paths between the kitchen and dining area, runners are essential to ensure entrees arrive at the proper temperature.

Bussers and Scullery Crew

Bussers protect the visual elegance of the room. While servers focus on course drops and guest interaction, bussers clear bread baskets, empty glassware, and soiled plates. For formal seated events, allocate one busser for every 30 to 40 guests.
Behind the scenes, dedicated scullery staff manage trash, sort flatware, run portable dish machines, and handle glass racks. For events exceeding one hundred guests, neglecting dedicated dish stewards forces servers off the floor to clean their own service pieces, stalling the meal schedule.

The Event Captain

Every event with more than four staff members requires a non-serving captain or floor manager. The captain does not carry trays. Instead, they act as the conductor: liaising with the event planner, keeping the banquet event order running on time, signaling the kitchen when to fire courses, and handling guest special requests. Without an unburdened captain, small friction points quickly escalate into operational bottlenecks.

Architectural and Layout Considerations

Standard staffing formulas assume an ideal floor plan with a hot kitchen directly adjacent to the dining room. In the catering world, however, ideal conditions are rare. The physical space dictates labor efficiency just as much as guest count.
  • Distance to the Galley: If the prep kitchen sits in a basement, behind an outdoor service tent fifty yards away, or down a long flight of stairs, travel time doubles or triples. Add twenty to thirty percent more runners to compensate for transit times.
  • Elevator Dependence: Multi-floor venues that require service staff to share a single elevator create unavoidable delivery delays. Staggering courses and adding stationary expediting stations on the dining floor becomes mandatory.
  • Table Distribution and Room Density: Tightly packed rooms with narrow aisles slow down servers carrying large oval trays on shoulder jacks. Wide, sprawling layouts require more steps per table. Both extremes reduce the number of guests an individual server can manage effectively.

Beverage Service and Bar Staffing

Bars are notorious for generating the longest, most frustrating lines at any catered gathering. Calculating bar staff requires examining what is being served and when guests will hit the bar hardest.
For a beer and wine bar, one bartender per 75 guests is usually sufficient to maintain a steady flow. For a full bar with custom cocktails, complex garnishes, and made-to-order mixed drinks, that ratio must drop to one bartender per 50 guests.
Furthermore, beverage staffing requires supporting labor:
  • Barbacks: For any bar serving more than one hundred guests, pair the bartender with a barback. The barback handles ice replenishment, fruit prep, beer restocking, and glassware rotation, allowing the bartender to keep their eyes up and hands pouring.
  • Table Wine Service: If you plan to pour wine tableside during a plated dinner, do not assume your standard floor servers can absorb that workload without falling behind on food service. Either add dedicated wine stewards at a ratio of one per 30 to 40 guests or ensure your dinner servers carry a reduced table load.

Timeline Pressure and Pacing

The event schedule dictates the intensity of service. A corporate awards banquet that allocates forty-five minutes for a three-course dinner requires an aggressive staffing model compared to a relaxed wedding dinner spanning two hours.
When a timeline is compressed, the window for error vanishes. To drop salads, clear bowls, deliver entrees, pour champagne, and clear dinner plates within a tight window, servers need smaller assigned stations. If the client demands rapid-fire transitions to accommodate speeches or keynote presentations, tighten your ratios by twenty to twenty-five percent. The investment in extra labor hours guarantees that service never interrupts the program.
Evaluating staffing ratios is fundamentally an exercise in risk management. By looking beyond simple formulas and adjusting for service style, support staff, physical distance, and schedule pressure, catering professionals can build realistic, profitable labor plans that deliver smooth execution from the first welcome drink to the final coffee pour.
read more
Bakery & Cake

Essential Bakery Sanitation Standards You Must Master

Commercial baking carries a deceptive reputation in the food service sector. Because loaves and pastries spend significant time in ovens reaching internal temperatures that destroy active pathogens, many operators fall into the trap of assuming bakery operations are inherently lower-risk than butcher shops, seafood markets, or commercial prep kitchens. That assumption is one of the most expensive mistakes an independent baker or production manager can make.
While the baking process provides an effective kill step for raw dough, the modern bakery environment is uniquely vulnerable to biological, chemical, and physical hazards. Bakeries handle massive volumes of fine dry powders that aerosolize, enter mechanical assemblies, and accumulate in dark, humid corners. They juggle nearly every major food allergen simultaneously, produce delicate high-moisture creams and custards, and rely on intricate machinery with dozens of moving parts that defy standard dish-pit wash cycles. Maintaining pristine sanitary conditions requires more than a casual end-of-shift wipe-down; it demands a systematic understanding of bakery-specific hygiene protocols.

The Operational Divide Between Wet and Dry Cleaning

The most fundamental concept in bakery sanitation is recognizing when water helps and when it creates a catastrophe. In standard restaurant kitchens, hot water and degreasers are the primary tools for restoring surfaces. In a bakery, introducing moisture into areas dominated by loose flour, powdered sugar, and dry starch creates a sticky paste that swiftly hardens into a mortar-like substance. Worse, that paste traps moisture against equipment housings and provides an ideal food source for mold spores and bacterial colonies.
A well-run bakery establishes strict boundaries between wet-cleaning and dry-cleaning zones. Dry zones include dry ingredient storage, flour silos, scaling tables, sifting areas, dough-shaping benches, and mechanical sheeters. In these zones, traditional hoses, wet mops, and saturated sponges must be banned during daily turnover.
Effective dry cleaning relies on specialized tools. Industrial vacuums equipped with certified HEPA filtration are essential. Standard shop vacuums are insufficient; their basic filters exhaust microscopic flour dust back into the ambient air, keeping it suspended until it settles on sanitized prep surfaces or inside cooling racks. Operators should pair HEPA vacuums with flexible plastic scrapers, stiff-bristled bench brushes, and lint-free microfiber towels lightly misted with alcohol-based, no-rinse sanitizers. Alcohol-based solutions evaporate within seconds, delivering the necessary sanitizing contact time without introducing residual moisture that gums up dry machinery.
Wet zones, conversely, belong around the dish-washing station, the pot-wash sinks, proofers with active steam injection, and areas dedicated to cold dairy, washed fruit, and finished product assembly. These zones require thorough degreasing, scrubbing with hot water, and a rinse-and-sanitize sequence using quaternary ammonium compounds or peracetic acid formulations designed to penetrate protein films.

Decontaminating Critical High-Contact Machinery

Bakery machinery is designed for torque, precision, and longevity, but rarely for effortless disassembly. Flour dust, shortening, and butter work their way into hidden bearings, belt tensioners, and electrical housings, creating chronic harborages for bacteria and insects. Master sanitation requires mastering the strip-down protocols for your core equipment.

Dough Sheeters and Lamination Tables

Reversible pastry sheeters endure continuous contact with high-fat laminated doughs and heavy dustings of bench flour. Over the course of a single shift, flour mixes with butter to form an oily crust on scraper blades and beneath the conveyor belts.
To properly sanitize a sheeter, start by releasing the tension on the canvas or synthetic belts. Never soak fabric belts in water; excessive moisture causes fabric belts to shrink, warp, and harbor fungal growth. Instead, use dry stiff brushes and vacuums to remove loose flour from the underside, followed by an approved dry-wipe sanitizer. Removable plastic or stainless steel scraper blades must be extracted daily, scraped clean of grease buildup, hand-washed in a three-compartment sink, sanitized, and thoroughly dried before reinstallation. Pay special attention to the roller ends where dough fragments can wedge into the side frames.

Spiral Mixers and Planetary Bowl Hubs

Mixer bowls present an obvious target for washing, but the real hazard lies directly above the bowl. The planetary head, the underside of the splash guard, and the shaft collars that secure dough hooks and beaters accumulate a steady spray of batter, liquid eggs, and damp flour paste.
If left unaddressed, this paste dries, cracks, and falls back into subsequent batches of dough. Clean the undersides of mixer heads after every shift using non-abrasive scrubbing pads and food-safe degreasers. Inspect the rubber seals and drive shafts regularly. If grease from the gear casing leaks past a worn gasket, it can contaminate edible product with non-food-grade lubricants.

Proofing Cabinets and Retarders

Proofing cabinets present the highest biological risk profile in the entire bakery. By design, proofers operate at elevated temperatures and sustained humidity levels of eighty percent or higher. This warm, damp environment acts as an incubator not just for yeast, but for environmental molds, yeasts, and bacterial biofilms.
Daily maintenance requires draining the bottom water pan, washing it to prevent mineral and microbial buildup, and wiping down interior walls with an EPA-registered fungicidal sanitizer. Weekly maintenance must include inspecting the door gaskets. Mold frequently establishes colonies inside the folded bellows of magnetic door seals, which then release spores into the cabinet every time the door swings open. Retarders, while cold, present similar condensation challenges that require regular moisture evacuation and coil disinfection.

Controlling Flour Dust and Pest Harborage Zones

Pests do not enter a bakery looking for cooked bread; they enter seeking calm, undisturbed caches of dry starch and grain. Stored-product pests, including red flour beetles, confused flour beetles, and Indian meal moths, can sustain entire reproductive cycles inside tiny crevices containing just a few grams of impacted flour.
Preventing infestations begins with incoming shipment protocols. Inspect every pallet and paper sack of flour, grain, and seed upon arrival. Reject bags with pinhole punctures, damp patches, or webbing along the seams. Once accepted, decant open bags immediately into food-grade polyethylene bins equipped with tight-fitting lids and dedicated, clean scoops. Never leave paper flour sacks open or rolled down loosely in storage closets.
Cleaning schedules must address spaces that are out of sight. Flour dust travels on air currents and settles on top of deck ovens, behind proofer exhaust vents, along overhead electrical conduits, and inside the track assemblies of sliding doors. These areas must be entered into the master schedule for routine vacuuming. High-pressure compressed air hoses should never be used to blast flour off hard-to-reach ledges. Blasting flour merely distributes the dust across wider surface areas and increases the concentration of combustible particulates in the air.

Allergen Separation and Cross-Contact Prevention

A single bakery may process eight of the nine major food allergens recognized by regulatory bodies: wheat, milk, eggs, tree nuts, peanuts, soy, and sesame, along with fish or shellfish in savory specialty applications. Unlike biological pathogens, allergens cannot be killed by heat. Even an oven running at five hundred degrees Fahrenheit will not denature allergen proteins enough to prevent a life-threatening anaphylactic reaction in a sensitive consumer.
Sanitation standards for allergen management focus entirely on preventing cross-contact. This starts with operational scheduling. Whenever possible, organize daily production to bake non-allergenic or single-allergen products first. Items containing chopped tree nuts, peanut butter, or heavy additions of sesame seeds should be produced at the end of the shift immediately preceding a full, wet-cleaning teardown.
Dedicate smallwares and color-code preparation tools. Use color-coded cutting boards, spatulas, pastry brushes, and scrapers to establish visual boundaries between allergen groups. A common practice assigns purple tools to allergen-sensitive prep, blue to standard dairy and egg doughs, and white to plain flour doughs.
When cleaning surfaces between allergen runs, rely on friction, detergents, and thorough rinsing. Alcohol sprays and standard sanitizers eliminate bacteria, but they do not remove allergen proteins. Protein removal requires mechanical scrubbing with warm water and surfactant-based soaps, followed by complete rinsing with clean water. Test the efficacy of your allergen changeover routines using rapid lateral-flow allergen protein swab tests on stainless steel tables and rolling pins before beginning subsequent batches.

Post-Bake Contamination and High-Risk Fillings

The moment baked goods emerge from the oven, their protective thermal barrier vanishes. As loaves and pastries cool, they draw in surrounding air. If that air is laden with mold spores from uncleaned overhead vents, or if cooling racks carry sticky residue from previous shifts, shelf life drops precipitously.
Cooling racks, canvas transport trays, and bread slicer blades represent prime vectors for cross-contamination. Bread slicers, in particular, accumulate crumbs saturated with fats from tender sandwich breads. These crumb beds collect humidity, turn rancid, and introduce mold to the soft, porous crumb of freshly cut loaves. Slicers must be unlatched, vacuumed, cleared with specialized blade brushes, and treated with food-grade sanitizing spray after every major production run.
When working with unbaked additions—such as custards, pastry creams, diplomat creams, and cream cheese icings—sanitation protocols must match those of high-care culinary facilities. Custards made from eggs, milk, and sugar are nutrient-rich mediums that support rapid proliferation of Staphylococcus aureus and Bacillus cereus.
Pastry chefs must observe strict time and temperature boundaries. Boiled pastry creams must be transferred immediately to shallow, sanitized stainless steel pans, covered with clean plastic film touching the surface to prevent condensation skin, and chilled through the danger zone to below forty degrees Fahrenheit within standard cooling windows. Reusable cloth piping bags should be eliminated in favor of disposable, single-use food-grade plastic sleeves. The seams and tips of traditional cloth piping bags are virtually impossible to sterilize consistently, making them a common vector for bacterial contamination in filled pastries.

Establishing and Enforcing the Master Sanitation Schedule

A sanitation program exists only if it is documented, verifiable, and enforced. Relying on staff memory or informal end-of-day expectations inevitably leads to overlooked tasks when shifts run late or orders surge.
Create a Master Sanitation Schedule that divides every surface, piece of equipment, and physical fixture in your bakery into four frequency tiers:
  • Shift-Level Tasks: Wiping prep tables, washing smallwares, emptying trash, scraping bench surfaces, dry-sweeping high-traffic prep paths.
  • Daily Tasks: Emptying and cleaning proofer drip pans, vacuuming sheeter belts, washing mixer hubs, cleaning three-compartment sinks, mopping wet zones with clean mop heads.
  • Weekly Tasks: Deep-cleaning oven doors and gaskets, descaling deck steamers, dismantling bread slicers, pulling wheeled refrigeration units away from walls to vacuum condensing coils and clean floor drains.
  • Monthly and Quarterly Tasks: Washing dry storage shelving, cleaning overhead ductwork and light fixtures, scrubbing floor-to-wall coves, inspecting dry ingredient storage bins for wear, and servicing exhaust hood filters.
Assign each task to a specific shift role, not an abstract group. Instead of writing “Mixers need cleaning,” assign the task: “Morning Production Lead cleans and sanitizes planetary hub and guards on the eighty-quart mixer.” Pair this schedule with physical sign-off logs and periodic supervisory inspections using ATP bioluminescence swab meters. ATP testing gives your team immediate, objective feedback by measuring organic residue left on allegedly clean equipment, turning abstract hygiene standards into measurable performance metrics.
Mastering these sanitation standards protects far more than health inspection scores. It protects product consistency, preserves fragile shelf life, prevents devastating allergen recalls, and builds the operational foundation necessary to run a reputable, high-performing bakery.
read more
Soup

The Art of the Velvety Puree: Mastering Vegetable Soups and Vibrant Herb Oils

A great vegetable puree soup is a study in texture. When executed properly, it achieves a gloss and weight that feels indulgent without relying on cups of heavy cream. Yet, all too often, homemade vegetable soups miss the mark, turning out either unpleasantly grainy, heavy like baby food, or watery and separated.
The secret to restaurant-caliber vegetable soup lies in understanding how plant starches, pectin, and water interact under heat and mechanical force. When you combine precise cooking techniques with high-shear blending and finish the bowl with an emerald-green, cold-infused herb oil, you create a dish that balances earthy depth with sharp, aromatic brightness.

The Mechanics of a Truly Silky Puree

Achieving a texture that coats the back of a spoon smoothly requires more than just cooking vegetables until they are soft and pressing a button on a blender. You are managing moisture, cellular breakdown, and emulsification.

Starch and Pectin Gelatinization

Vegetables maintain their structure through cellulose and pectin. As they simmer or roast, pectin breaks down, softening the cell walls so they can easily shear apart. Starchy vegetables, such as winter squash, potatoes, and parsnips, release starch granules into the cooking liquid. These starches absorb water, swell, and gelatinize, providing the soup with its natural body.
Fiber-heavy vegetables like carrots, cauliflower, and broccoli contain less gelatinizing starch and more insoluble cellulose. To make these vegetables feel creamy, you must either cook them until their cell walls completely surrender or introduce a complementary starch carrier, like a single Yukon Gold potato, a handful of cooked cannellini beans, or a small portion of arborio rice simmered directly in the broth.

The Role of High-Shear Blending

An immersion blender is convenient for rustic soups, but it cannot deliver an ultra-smooth finish. Its blade spins too slowly and lacks the tight clearance needed to pulverize fibrous skins and cellulose strands.
To produce a velvety finish, transfer the hot soup to a high-speed countertop blender. High-speed blenders create a powerful vortex that pulls the liquid through micro-beveled blades at tens of thousands of revolutions per minute. This intense mechanical shear tears the plant cells apart into microscopic particles that hang in suspension, preventing the solids from settling out of the liquid.
Always blend in batches, never fill the blender pitcher more than halfway with hot soup, and remove the center cap from the lid, covering it with a folded kitchen towel to let steam escape safely.

Emulsifying Fat at the Finish

Fat brings flavor compounds to your palate, but it also smooths out texture. Instead of boiling heavy cream into the soup base, blend cold, cubed unsalted butter, full-fat coconut cream, or extra-virgin olive oil into the puree during the final thirty seconds of blending.
The spinning blades will disperse the fat into microscopic droplets suspended within the vegetable liquid, creating a temporary emulsion. This technique, borrowed from classic French pan sauce finishing, gives the soup an opaque, mirror-like sheen and a rich mouthfeel without clouding the distinct flavor of the vegetable.

Passing Through a Fine-Mesh Sieve

Even with a high-speed blender, some residual grit and fibrous strands can linger, especially with root vegetables and squash skins. Pouring the blended soup through a fine-mesh conical strainer directly into a clean pot catches those remaining fibers. Use the back of a ladle to press the liquid through, leaving only a dry cake of insoluble pulp behind. This single step elevates a good home soup into a polished, professional dish.

Crafting Emerald Herb Oils That Do Not Oxidize

A rich, earthy vegetable puree needs contrast. A splash of vinegar can sometimes feel too sharp, while plain herbs quickly wilt and turn dull in hot broth. A freshly made herb oil solves both problems, providing a clean fat that carries volatile aromatic compounds while adding a vibrant green accent to the surface of the soup.
Making an herb oil that retains its color requires counteracting heat-induced oxidation. When herbs are bruised or slowly heated, enzymes known as polyphenol oxidases react with oxygen, turning bright chlorophyll into dull, brownish pheophytin.

The Blanch and Shock Method

To preserve that bright green color, you must denature those degrading enzymes with heat before they can react.
Bring a pot of salted water to a rolling boil and prepare a bowl of ice water nearby. Drop your washed, tender herbs—such as parsley, chives, tarragon, basil, or cilantro—into the boiling water for no more than eight to ten seconds. The leaves will turn bright green almost immediately.
Remove them quickly with a slotted spoon or spider skimmer and plunge them directly into the ice bath to halt cooking. Once thoroughly chilled, lift the herbs out and squeeze them in a clean tea towel until completely dry. Removing excess moisture is essential, as water trapped in the oil will make it cloudy and dramatically shorten its shelf life.

Blending and Gravity Straining

Place the dried herbs into a blender with a neutral, high-quality oil, such as grapeseed, light avocado, or a mild, buttery extra-virgin olive oil. A standard ratio is two cups of packed blanched herbs to one cup of oil.
Blend on high for two to three minutes. The friction of the blades will warm the mixture slightly, extracting both the fat-soluble chlorophyll and aromatic oils into the carrier liquid. Do not let the mixture get hot to the touch, or the herbs will begin to cook and darken.
Line a fine-mesh sieve with a damp coffee filter or two layers of cheesecloth set over a clean glass bowl. Pour the herb-oil slurry into the filter and let it drain undisturbed in the refrigerator. Never press or squeeze the solids through the filter, as forcing pulp through will leave you with a murky oil instead of a crystal-clear, jewel-toned green.
Once strained, store the oil in an airtight squeeze bottle or glass jar away from light. It will keep its vibrant color and fresh aroma for up to a week.

Three Velvety Puree Recipes and Pairings

Each of these recipes balances seasonal vegetables with a complementary herb oil, using targeted aromatics and precise blending techniques.

Roasted Butternut Squash and Fennel with Sage-Tarragon Oil

Butternut squash contains ample natural sugar that benefits from high-heat caramelization. Pairing it with roasted fennel cuts through the natural sweetness with a subtle, anise-like earthiness.
For the Sage-Tarragon Oil:
  • 1 cup fresh flat-leaf parsley leaves
  • 1/2 cup fresh tarragon leaves
  • 1/4 cup fresh sage leaves
  • 1 cup grapeseed oil
Blanch the parsley, tarragon, and sage together for eight seconds, shock in ice water, squeeze completely dry, and blend with the grapeseed oil on high speed for two minutes. Strain through a coffee filter.
For the Soup:
  • 1 large butternut squash (about 3 pounds), peeled, seeded, and cut into 1-inch cubes
  • 1 large fennel bulb, trimmed and sliced (reserve fronds for garnish)
  • 1 medium yellow onion, chopped
  • 3 tablespoons olive oil
  • 3 cloves garlic, smashed
  • 4 cups low-sodium vegetable or chicken stock
  • 2 tablespoons unsalted butter, cold and cubed
  • 1 teaspoon kosher salt, plus more to taste
  • 1/4 teaspoon freshly grated nutmeg
Toss the squash and fennel with two tablespoons of olive oil, salt, and a pinch of black pepper. Spread across a large baking sheet and roast at 400 degrees Fahrenheit for 35 to 40 minutes, until the edges are golden and deeply caramelized.
In a heavy soup pot, heat the remaining tablespoon of olive oil over medium heat. Add the chopped onion and cook until soft and translucent, about six minutes. Add the smashed garlic and cook for one minute until fragrant. Add the roasted squash and fennel, then pour in the stock. Bring the mixture to a gentle simmer for ten minutes to meld the flavors.
Transfer the mixture in batches to a high-speed blender. Add the cold butter cubes and freshly grated nutmeg to the final batch. Blend on high until completely smooth, then strain through a fine-mesh sieve into a clean pot. Adjust seasoning with salt if needed.
Ladle the hot soup into shallow bowls and finish with a circular drizzle of the sage-tarragon oil and a few delicate reserved fennel fronds.

Golden Cauliflower and Leek with Chive-Parsley Oil

Cauliflower produces an exceptionally delicate, ivory-colored puree when sweated in butter rather than roasted. The key here is keeping the vegetable pale to preserve its gentle, nutty flavor, which contrasts cleanly against a rich chive oil.
For the Chive-Parsley Oil:
  • 1 large bunch fresh chives, roughly chopped
  • 1 cup fresh flat-leaf parsley leaves
  • 1 cup mild extra-virgin olive oil
Blanch the chives and parsley for five seconds, plunge into ice water, squeeze dry, and blend with the olive oil for two minutes. Strain without pressing through a lined sieve.
For the Soup:
  • 1 large head white cauliflower, broken into small florets
  • 2 large leeks, white and pale green parts only, washed thoroughly and sliced thin
  • 1 small Yukon Gold potato, peeled and diced small
  • 3 tablespoons unsalted butter, divided
  • 4 cups simmering vegetable stock or light poultry stock
  • 1/4 cup heavy cream or full-fat coconut milk (optional)
  • 1/2 teaspoon white pepper
  • Kosher salt to taste
Melt two tablespoons of butter in a Dutch oven over low heat. Add the sliced leeks with a generous pinch of salt. Cook slowly for eight to ten minutes, sweating them without letting them take on any brown color.
Add the cauliflower florets, diced potato, and simmering stock. The liquid should sit just level with the vegetables; do not drown them, or your puree will turn out thin. Bring to a boil, then immediately drop the heat to low, cover, and simmer gently for 15 to 20 minutes until the cauliflower and potatoes are tender throughout.
Puree the mixture in a high-speed blender, incorporating the remaining tablespoon of cold butter and white pepper. Pass through a fine strainer back into the pot, stir in the cream if using, and taste for salt. Serve hot, breaking the ivory surface with concentrated dots of the dark green chive-parsley oil.

Charred Carrot and Fresh Ginger with Cilantro-Scallion Oil

Carrots hold a dense fibrous matrix that requires thorough cooking and high blending speed to turn silky. A quick sear in the pan gives the carrots a subtle smoky edge that pairs naturally with spicy fresh ginger and bright, grassy cilantro oil.
For the Cilantro-Scallion Oil:
  • 1 1/2 cups fresh cilantro leaves and tender stems
  • 1/2 cup sliced scallion greens
  • 1 cup light avocado oil
Quickly blanch the cilantro and scallion greens in boiling water for six seconds. Shock in ice water, dry thoroughly, and blend with avocado oil on high. Strain slowly through a coffee filter.
For the Soup:
  • 2 pounds sweet carrots, scrubbed, peeled, and sliced into 1/2-inch rounds
  • 1 medium yellow onion, sliced
  • 2 tablespoons peeled and finely grated fresh ginger
  • 2 cloves garlic, minced
  • 2 tablespoons neutral cooking oil
  • 4 cups light vegetable stock or filtered water
  • 1 tablespoon fresh lime juice
  • 1 tablespoon pure maple syrup
  • Kosher salt to taste
Heat the neutral oil in a wide, heavy-bottomed pot over medium-high heat. Add the sliced carrots and let them sit undisturbed for two to three minutes to pick up a light, savory char on the bottom. Stir and let them color for two more minutes.
Reduce the heat to medium. Add the sliced onion, grated ginger, and minced garlic. Cook, stirring frequently, until the onions soften, about five minutes.
Pour in the stock, using your wooden spoon to scrape up any browned bits stuck to the bottom of the pot. Bring to a boil, then reduce the heat to low, cover, and simmer for 25 minutes until the carrots offer zero resistance when pierced with a paring knife.
Transfer to a high-speed blender and process for a full two minutes to break down the tough carrot fiber into a velvety puree. Stir in the fresh lime juice and maple syrup to balance the earthy sweetness. Strain through a fine-mesh sieve into your serving pot.
Serve in wide bowls, drizzling the bright cilantro-scallion oil across the top just before serving.

Plating and Textural Contrast

A pureed soup is inherently uniform in texture. While that silky mouthfeel is satisfying, a great presentation introduces small, deliberate contrasts.
  • Control temperatures: Ensure the soup is served steaming hot, while the herb oil is kept at room temperature. Cold oil pulled straight from the refrigerator will cool down the soup surface too quickly and congeal, dulling its aroma. Room-temperature oil floats lightly on top and releases its fragrance the moment it touches the hot broth.
  • Vary the pour: To create clean pools of oil, hold a small spoon close to the surface and tip it gently. For fine, controlled lines or geometric dots, use a plastic squeeze bottle. If you prefer a marbled, rustic look, drag a skewer or the tip of a knife through the oil droplets.
  • Add a crisp element: A smooth puree welcomes a light, crunchy garnish. Consider toasted pumpkin seeds on butternut squash soup, sourdough croutons fried in olive oil over cauliflower soup, or thinly sliced crispy shallots on top of carrot-ginger soup. Keep garnishes small and light so they float on the surface rather than sinking into the puree.
Cooking a memorable vegetable puree is less about adding heavy dairy and more about respecting the structure of the ingredients. By letting plant starches provide natural body, blending thoroughly, and contrasting rich purees with pure, vibrant herb oils, you turn simple root vegetables and greens into an elegant, complete meal.
read more
Restaurant

Mastering Pasta Texture: The Science and Technique Behind Restaurant-Quality Bites

Dining at an exceptional Italian restaurant often reveals a stark contrast between professional pasta cookery and home preparation. In the hands of a skilled line cook, pasta arrives at the table with an unmistakable vitality: supple yet resilient, offering a distinct toothsome core, and dressed in a glossy, clinging sauce that never pools at the bottom of the bowl. At home, that same box of dried noodles often yields a limp, waterlogged noodle slicked in oil, with the sauce sliding off entirely.
The difference rarely comes down to secret culinary tricks. Instead, achieving that coveted restaurant texture is an exercise in applied food science. Great pasta relies on careful starch gelatinization, gluten network preservation, thermal stability, and mechanical emulsification. When you understand the structural changes that occur from the moment a noodle hits the boiling water to the final toss in the skillet, you can consistently produce plates of pasta that rival top-tier dining rooms.

Sourcing the Right Foundation: Extrusion and Protein Metrics

Before water ever touches your pan, the physical texture of your dish is largely determined at the grocery shelf. Many home cooks assume all dried pasta is functionally identical, but manufacturing processes create vastly different structural foundations.
Commercial commodity pasta is typically extruded through Teflon-coated dies at high speeds. This produces a smooth, slick, and shiny noodle with a bright yellow hue. While Teflon dies are cost-effective for large manufacturers, they create a dense surface with no micro-texture. Sauce cannot cling to this glassy surface, and the outer layers of the noodle tend to swell and turn gummy before the center cooks through.
Superior dried pasta is extruded through bronze dies (often labeled trafilata al bronzo). Bronze dies exert friction on the dough as it passes through, tearing microscopic fissures into the surface. This produces a pale, matte, chalky exterior resembling fine sandpaper. These microscopic abrasions perform two vital functions: they slough off clean starch into the cooking water to build velvety emulsions, and they provide physical grip so sauce adheres directly to the pasta.
Equally important is the wheat itself. Look for packages indicating one hundred percent durum wheat semolina with a declared protein content of at least 13 to 14.5 grams of protein per 100 grams. High-protein durum semolina forms an intricate, tightly knit gluten matrix. This protein web acts as a scaffold that traps expanding starch granules during boiling. In low-protein pasta, that matrix breaks down quickly, allowing starches to burst outward into a sticky sludge and leaving the noodle mushy rather than firm.

The Water Bath: Salinity, Volume, and Boil Dynamics

Cooking pasta properly requires managing a violent thermodynamic environment. You need a heat transfer medium capable of hydrating the starch while maintaining a constant temperature.

The Thermal Reservoir Myth

Culinary folklore often insists on using massive stockpots filled with several gallons of water for a single pound of pasta. While you do need enough water to submerge the noodles completely, excessive water dilutes the very asset you need later: starch.
Use roughly three to four quarts of water per pound of dried pasta. This volume provides enough thermal mass so that the water returns to a rolling boil within thirty to forty-five seconds of adding the pasta, preventing the noodles from settling on the bottom and clumping. At the same time, this concentrated water-to-pasta ratio produces a cloudy, starch-rich liquid that becomes the structural backbone of your finished sauce.

Precision Salting

Salting pasta water is not about seasoning the water; it is about seasoning the noodle from the inside out. As the dry starch granules absorb boiling water, they swell and lock in whatever minerals are present. If the cooking liquid is unseasoned, the interior of the noodle remains bland, and no amount of salted sauce poured over the top can compensate for an unseasoned starch core.
Aim for a salinity level of roughly one percent by weight, which translates to approximately one to one and a half tablespoons of coarse kosher salt per gallon of water. The water should taste distinctly savory, like a well-seasoned broth, rather than unpalatably briny. Add the salt only after the water reaches a rolling boil to prevent undissolved salt crystals from pitting stainless steel cookware, and let it dissolve completely before dropping the pasta.
Never add olive oil to the pasta pot. While meant to prevent sticking, oil floats on top of the water, coating the pasta as it is lifted out and creating an impermeable barrier that stops sauce from binding to the surface.

Deconstructing True Al Dente

The phrase al dente translates literally to “to the tooth,” yet it is frequently misunderstood as undercooked or crunchy pasta. A raw noodle is brittle and chalky; a properly cooked al dente noodle is fully hydrated and pliable, yet offers a clean, resilient resistance when severed by the incisors.
As pasta cooks, boiling water penetrates the dry core from the outside inward. The starch granules absorb moisture and gelatinize, expanding and softening. Simultaneously, the gluten proteins denature and firm up around the starch. If you boil the noodle until this process is one hundred percent complete in the pot, the exterior layers will be overcooked, soft, and fragile by the time the center is tender.
To achieve restaurant-grade texture, you must pull the pasta from the water two to three minutes before the package directions specify. At this transitional stage, if you bite into a noodle or cut it crosswise with a knife, you will see a tiny, pinhead-sized white dot or ring in the very center—known in traditional Italian kitchens as l’anima, or “the soul.” This ungelatinized core ensures that the noodle maintains structural integrity through the most important step of the entire recipe: the pan finish.

The Alchemy of Mantecatura: Finishing in the Pan

The single most impactful difference between an amateur plate of pasta and a professional one is where the cooking concludes. Professional kitchens never drain pasta into a colander, dump it onto a plate, and spoon sauce over the top. Instead, they finish cooking the pasta directly inside the skillet with the sauce through a process known as mantecatura.
Using tongs or a spider strainer, transfer the partially cooked pasta directly from the boiling water into a wide sauté pan holding your simmering sauce base. Bring the heat to medium-high. Because the noodles are still hungry for moisture, they begin drinking in the seasoned, flavorful sauce rather than plain tap water, infusing the paste with deeper flavor.
As the pasta cooks those final two to three minutes in the pan, ladle in several ounces of the reserved, cloudy pasta cooking water. This liquid contains high concentrations of amylose and amylopectin starches, which have leached out from the bronze-cut noodles.
When you vigorously stir and toss the pasta, the mechanical action forces the suspended starches in the water to bond with the cooking fats in your sauce—whether olive oil, butter, or rendered pork fat like guanciale. The starches act as natural emulsifiers, stabilizing the fat and water into a creamy, glossy glaze that physically clings to every crevice of the pasta. The noodle finishes cooking to a tender, unified consistency without losing its firm spine.

Agitation, Aeration, and Temperature Regulation

Creating this structural glaze requires physical energy. Simply letting the pasta simmer passively in the skillet will result in separated, greasy pools of oil and water.
Keep the skillet moving continuously. Use a rhythmic flipping motion to launch the pasta into the air and catch it, or stir vigorously with a pair of silicone-tipped tongs. This constant motion does three things:
  • It knocks loose surface starches into the liquid to thicken the emulsion.
  • It introduces air into the pan, cooling the sauce slightly and encouraging rapid emulsification.
  • It ensures every noodle receives equal heat exposure, preventing uneven patches.
Pay close attention to heat management when finishing dishes with hard cheeses like Parmigiano-Reggiano or Pecorino Romano. These aged cheeses are delicate protein networks. If introduced over high, direct heat, the dairy proteins contract violently, separating into an oily liquid and rubbery, grainy clumps that ruin the texture of the sauce.
Always kill the flame completely before adding grated cheese. Let the pan rest off the burner for twenty to thirty seconds so the temperature drops below 160 degrees Fahrenheit. Sprinkle the finely grated cheese across the pasta while continuing to toss and swirl, adding an extra splash of warm pasta water if the sauce appears tight or sticky. The residual heat will melt the cheese smoothly into the existing starch-fat emulsion, yielding a velvety, cohesive texture.

Understanding Fresh Versus Dried Pasta Profiles

Achieving the right texture also requires aligning your expectations with the type of pasta you choose to make or buy. Fresh pasta and dried extruded pasta are entirely different culinary mediums with separate textural goals.
Dried pasta, made from hard durum semolina and water, is engineered for density, durability, and a firm, toothsome bite. It is the proper choice for oil-based sauces, hearty ragùs, and emulsions like carbonara and cacio e pepe, where a sturdy noodle provides necessary structural contrast.
Fresh egg pasta—typically crafted from tender Type 00 soft wheat flour and whole egg yolks—contains higher fat, more moisture, and a far more delicate gluten structure. Fresh tagliatelle, pappardelle, or filled shapes like tortellini cook in ninety seconds to three minutes. They will never possess the snappy, firm bite of dried semolina pasta, nor should they.
Instead, the benchmark for fresh pasta texture is silky, supple tenderness with an elastic, pillowy chew. Overcooking fresh pasta turns it into mush within seconds, while properly timed fresh pasta should glide across the palate with luxurious, melt-in-the-mouth richness. Pairing rich butter sauces, delicate broths, or light cream reductions with fresh pasta honors its tender nature, while pairing those same sauces with an overcooked dried noodle produces a heavy, flaccid meal.
Mastering pasta texture requires discarding the idea that pasta is merely a neutral vehicle for sauce. When you treat the noodle as an active, structural element that interacts dynamically with heat, salt, and fat, you bridge the gap between standard weeknight fare and the memorable, toothsome plates served in Italy’s finest trattorias.
read more
Cooking Tips

The Art of Root-to-Stem Cooking: Transforming Kitchen Scraps into Culinary Assets

Every time a cook trims a head of cauliflower, strips dark kale leaves from their woody ribs, or lops off the bushy green plumes of young carrots, an unexamined reflex takes over. The cutting board is cleared with the broad side of a chef’s knife, sweeping a substantial portion of the vegetable’s total biomass directly into the trash or compost pail. For decades, conventional home recipes have reinforced this habit, instructing cooks to harvest only the most tender, uniform centers of plants while treating everything else as disposable packaging.
Root-to-stem cooking fundamentally dismantles this dichotomy. Modeled after the respectful, zero-waste ethos of whole-animal butchery and rooted in time-tested regional food cultures, this approach treats whole produce as an integrated culinary resource. The tough stalks, leafy crowns, papery skins, and fibrous cores are not waste products; they are distinct culinary components with unique textures, aromatic qualities, and concentrated sugars. Mastering root-to-stem cooking is not an exercise in reluctant austerity. When approached with proper technique, these overlooked plant parts yield bright condiments, deeply caramelized stocks, textural garnishes, and complex seasoning powders that elevate everyday home cooking.

Unlocking the Flavor Potential of Leaves and Green Tops

Vegetable tops often suffer from a marketing problem. Shoppers routinely snap the lush greens off carrots, radishes, beets, and turnips right in the grocery aisle, leaving them behind to avoid paying for excess weight. In doing so, they discard some of the most dynamic, nutrient-dense greens available.
Because leafy tops endure direct sun exposure and work continuously to feed the root below, they develop bold flavor profiles marked by earthy minerality, peppery heat, or slight bitterness. The secret to working with these greens lies in balancing their astringency with rich fats, acids, and salt.
Carrot fronds possess a delicate, fern-like structure and an assertive herbaceous profile reminiscent of a cross between Italian flat-leaf parsley and wild chervil. Rather than stewing them, which can make their fine texture slimy, treat them as a fresh finishing herb:
  • Herbaceous Sauces: Finely chop clean carrot tops and fold them into a classic chimichurri alongside garlic, red wine vinegar, and good olive oil to spoon over grilled meats.
  • Textured Pestos: Blend blanched carrot greens with toasted walnuts, grated aged cheese, garlic, and rich extra virgin olive oil. Blanching the greens in boiling salted water for fifteen seconds before shocking them in ice water locks in an emerald hue and softens raw bitterness.
  • Aromatic Finishing Garnishes: Mince raw carrot tops finely with lemon zest and flaky sea salt to create an herbal gremolata for roasted winter root vegetables.
Radish and turnip greens, on the other hand, carry a sharp, mustard-like pungency when raw. When exposed to heat, however, those sharp glucosinolates break down into gentle, sweet brassica flavors. Sauté washed radish tops in butter or bacon drippings with thinly sliced shallots, or fold them into a hot frittata right as the eggs begin to set.
Beet greens, which are botanically tied to Swiss chard, feature sweet, tender leaves and striking ruby-red veins. Braise them slowly with garlic, crushed red pepper flakes, and a splash of apple cider vinegar, or wilt them into warm grain bowls topped with roasted beets and goat cheese.

Rescuing Stems, Ribs, and Cores: Texture in Disguise

While greens offer intense herbal notes, vegetable stems and cores offer exceptional structural texture. Home cooks often discard the thick stems of broccoli, the solid base of cauliflower, and the fibrous ribs of Swiss chard because they seem impossibly woody.
The issue is rarely the entire stem, but rather the tough outer layer of lignified plant cellulose. Beneath that fibrous exterior lies a crisp, juicy core that is sweeter and milder than the florets or leaves above it.

Shaving and Sautéing Brassica Cores

Broccoli and cauliflower stalks are culinary goldmines waiting to be liberated. Use a sharp vegetable peeler or paring knife to carve away the tough, fibrous outer skin until you reach the pale, translucent jade interior.
This inner core can be sliced into matchsticks for raw, crunchy slaws tossed in a tangy mustard vinaigrette, or shaved paper-thin on a mandoline and dressed with lemon juice, olive oil, and shaved Parmesan. If cooked preparations are preferred, cut peeled broccoli stalks into bite-sized coins and stir-fry them over high heat with ginger and garlic; they retain an enjoyable crisp-tender bite long after the delicate florets would turn to mush.
Cauliflower cores can be diced small and folded into rice pilafs, simmered in chicken broth until velvety soft and pureed into rich, cream-free vegetable soups, or roasted alongside florets at high temperatures to achieve deep, nutty caramelization.

Transforming Fibrous Ribs Through Pickling and Braising

The wide, sturdy ribs of Swiss chard, collard greens, and Tuscan kale are often stripped out and discarded to make the leafy greens cook evenly. Instead of discarding them, bundle the stems together and slice them thinly across the grain.
Because chard stems possess a clean, celery-like snap with subtle earthy undertones, they excel in quick-pickling brines. Bring equal parts white wine vinegar and water to a simmer with sugar, salt, yellow mustard seeds, and cracked black peppercorns. Pour the hot brine over sliced, colorful chard stems packed in a glass jar. After twenty-four hours in the refrigerator, you have a vibrant, acid-forward condiment that adds crunch to rich braises, pulled pork sandwiches, or cheese boards.

Maximizing Peels, Skins, and Outer Husks

A surprising amount of vegetable prep starts with mindless peeling. For most clean, thin-skinned produce—such as young carrots, parsnips, and delicate-skinned summer squashes—peeling is entirely unnecessary. A vigorous scrub with a stiff kitchen brush under cool running water removes soil while preserving the skin, where much of the plant’s natural aroma and earthy character reside.
When thick, fibrous skins must be removed, do not rush them to the compost. Potato peels, sweet potato skins, and winter squash trimmings contain concentrated starches and sugars that crisp up beautifully under dry, intense heat.
To make potato skin crisps, toss clean, thoroughly dried potato peelings with melted beef tallow or high-smoke-point oil, kosher salt, and smoked paprika. Spread them in an even, single layer on a parchment-lined baking sheet and roast at 400 degrees Fahrenheit until shattering and golden brown. These crispy, blistered skins make an addictive bar snack or a textural garnish sprinkled over baked potatoes and chowders.
Even the tough skins of winter squashes, such as butternut and acorn, can be repurposed. Slice peeled skins into thin ribbons, toss them lightly in oil, and shallow-fry them until crisp, creating crunchy vegetable cracklings to crown autumn soups and risottos.

Mastering the Scrap Stock: The Discipline of Balance

The traditional scrap stock bag kept in the freezer is a staple of thrifty kitchens, but it often yields disappointing, murky results. Tossing every single vegetable remnant into a pot and simmering it for hours frequently produces a bitter, sulfurous, or overly sweet broth. A great scrap stock requires thoughtful ingredient curation.
Vegetables fall into distinct chemical profiles, and certain scraps do not belong in an all-purpose stock pot:
  • What to Keep: Allium trimmings (onion ends, leek tops, garlic skins), carrot tops and peelings, celery leaves and bottoms, mushroom stems, parsley and cilantro stems, tomato skins, and sweet corn cobs.
  • What to Avoid: Brassicas (cabbage cores, broccoli stalks, Brussels sprout leaves, turnip skins) and nightshade leaves. Brassicas release volatile sulfur compounds when boiled for extended periods, turning broth bitter, pungent, and cloudy. Starchy potato skins should also be omitted, as they break down into a cloudy sludge that makes clear straining impossible.
Mushroom stems are particularly valuable. Shiitake and cremini stems contain high concentrations of natural glutamic acid, the compound responsible for savory umami depth. Adding a handful of washed mushroom stems alongside the yellow papery skins of yellow onions not only builds a savory, mouth-coating base, but also imparts a rich, deep amber hue to the finished liquid without requiring artificial browning agents.
When building stock, cover your balanced frozen scraps with cold water, bring the pot to a gentle simmer, and maintain it for no longer than forty-five minutes to an hour. Unlike animal bones, which require hours to yield collagen, vegetables surrender their water-soluble flavors quickly. Extended boiling breaks down delicate aromatics and introduces bitter vegetable off-notes.

Preserving Odds and Ends Through Dehydration

One of the most elegant, space-efficient methods for repurposing clean vegetable scraps is transforming them into concentrated seasoning powders. Dehydration evaporates all internal water while concentrating essential oils, sugars, and natural minerals, resulting in long-lasting, shelf-stable pantry staples.
Leek tops serve as a prime example. While the pale green and white bases are celebrated in classic cooking, the dark, fibrous green tops are often cast aside due to their tough texture. Wash these dark green leaves thoroughly to clear any trapped sand, pat them completely dry, and slice them into ribbons.
Arrange the ribbons on a dehydrator tray or on a baking sheet inside an oven set to its lowest possible temperature, ideally between 150 and 170 degrees Fahrenheit. Once the leaves are completely dry, brittle, and snap cleanly between your fingers, let them cool to room temperature.
Transfer the dried greens to a high-speed blender or clean spice grinder and pulse them with coarse sea salt until reduced to a fine, olive-green powder. This homemade leek-ash salt delivers a smoky, savory onion punch that enlivens scrambled eggs, roasted meats, hot popcorn, and roasted potatoes.
You can apply the same dehydration technique to discarded tomato skins left over from canning, turning them into a vibrant red powder packed with natural acidity and umami, or to the clean outer skins and tops of shallots and garlic for an artisan allium blend that puts store-bought onion powder to shame.
Root-to-stem cooking is ultimately an exercise in shifting perspective. It invites cooks to look at a wooden cutting board not as a site of aggressive subtraction, but as a space of culinary possibility. When we stop viewing food trim through the narrow lens of traditional kitchen waste and begin treating it with culinary technique, we discover that the most exciting, complex flavors are often the very ones we were about to throw away.
read more
Catering

How to Choose the Best Catering Service in Sydney

Modern catering is far from its literal meaning of “supplying provisions.” It’s more than just food delivery. A good catering service will select the right format and menu for your event, provide staff, tableware — in short, a turnkey “event design.” Catering is in high demand and convenient because it’s not tied to a specific location or establishment. You can set a table in an office or on a riverbank, host a hookah party, a coffee break during negotiations with partners, or a modest buffet. Below, we will tell you how to choose the best event catering Sydney has to offer.

How to Choose a Catering Company to Avoid Disappointment

There are many companies offering off-site catering services. Therefore, if you don’t want to disappoint yourself and your guests, approach the selection process carefully:

  1. You know exactly what you want to celebrate. Therefore, a competent company manager will professionally advise you on the proposed format of the event, explain the selection of dishes, how to correctly calculate the menu based on the number of guests, and other important details. Be sure to clarify the maximum number of guests the company can serve, the delivery areas, and what equipment it has.
  2. Is the quality of the food and delivery entirely the company’s responsibility, or does it outsource services?
  3. Ask the company representative how to optimize event planning costs. If the manager offers only expensive options, be wary. A good specialist will always offer cost-cutting advice to ensure the client doesn’t overpay for something they don’t need.
  4. The cost of a reputable catering company’s services should always be transparent. During the conversation with the manager during the ordering process (before payment, of course!), you’ll get a clear understanding of the components of the event service price.
  5. Be sure to inquire about additional services (for example, the tableware in the advertising photo looked stylish and expensive, but you were simply given lunchboxes). The order included the cost of the menu, not the fancy tableware. Of course, in this case, the celebration could be ruined.

Of course, it’s much more convenient when a catering company can fully handle the event without using contractors. By choosing Canape Club, you’re already maximizing your costs!

Characteristics of Choosing a Quality Caterer

First and foremost, you’re the client. This means you have the right to know everything you need to make a decision. For example, if you’re presented with a menu without information on the grams and total cost per person, demand it. Tables shouldn’t look empty when guests arrive. Find out how appetizers will be served and when the main course will be served.

Don’t forget about tableware; make sure it’s appropriate for the number of guests and whether it’s included in the final price. Just in case, inquire about the availability of additional clean dishes and how quickly they can find them. If you plan to take leftover dishes, arrange for suitable containers in advance or prepare your own in advance.

Stay in constant contact with the person in charge of organizing your event to make any necessary adjustments and oversee the event itself. You should know what time the food will be delivered and be confident that it will be fresh and hot when your guests arrive.

read more
Food

Staples of The Cyprus Diet (Common Food Ingredients, Traditional Methods of Cooking, Local Dishes)

The food of Cyprus is often described as Mediterranean, yet that label alone does not fully capture its character. The island’s cuisine is rooted in simplicity, shaped by geography, and refined through centuries of cultural exchange. To understand the staples of the Cyprus diet is to look beyond individual recipes and examine the ingredients, cooking methods, and traditions that define daily life on the island.

Cypriot food is not built on complexity. Instead, it relies on quality ingredients, patience in preparation, and the shared experience of eating together.

Olive Oil as the Foundation of Flavor

Few ingredients are as central to the Cyprus diet as olive oil. Used in cooking, dressing salads, preserving vegetables, and finishing dishes, olive oil is the backbone of the island’s culinary identity. Its presence is constant, from rustic village kitchens to modern restaurant plates.

Olive groves have long dotted the Cypriot landscape, and the oil they produce carries a fresh, slightly peppery flavor. Rather than overpowering a dish, it enhances natural ingredients. Vegetables are gently sautéed in it, meats are marinated with it, and bread is dipped into it with little ceremony but great appreciation.

Bread and Grains in Everyday Meals

Bread holds an almost sacred place at the Cypriot table. Whether it is rustic village bread baked in stone ovens or flatbread served alongside grilled meats, bread accompanies nearly every meal.

Wheat has been cultivated on the island for thousands of years, making grains an enduring dietary staple. Bulgur, rice, and cracked wheat frequently appear in both everyday dishes and festive recipes. These grains provide substance and balance, often absorbing the flavors of herbs, lemon, and slow-cooked meats.

The simplicity of bread and grains reflects the agricultural roots of the island’s cuisine.

Halloumi and Dairy Traditions

Dairy products, particularly halloumi, are integral to the Cyprus diet. Traditionally made from sheep’s and goat’s milk, halloumi is valued for its firm texture and salty character. It can be grilled, fried, or eaten fresh, and it often serves as a protein source in vegetarian meals.

Beyond halloumi, yogurt also plays an important role. Thick, strained yogurt is used in sauces, dips, and as a cooling accompaniment to spiced dishes. Dairy adds richness while balancing the brighter notes of lemon and herbs.

These traditions reflect Cyprus’s long history of pastoral farming and small-scale production.

Herbs, Citrus, and Aromatic Depth

Cypriot cooking is defined by fragrance as much as flavor. Fresh oregano, thyme, mint, and parsley appear generously across dishes. Lemon juice is used to brighten meats and vegetables, while crushed coriander seeds give certain dishes a distinctive warmth.

Unlike some neighboring cuisines that rely heavily on intense spice blends, Cypriot seasoning often feels measured and harmonious. The goal is not to mask ingredients but to elevate them. The result is food that feels fresh and aromatic rather than overwhelming.

The use of local herbs reinforces the connection between cuisine and landscape, as many of these plants grow abundantly across the island.

Traditional Methods of Slow Cooking

One of the defining features of the staples of the Cyprus diet is the emphasis on slow cooking. Patience is embedded in many traditional methods.

Clay ovens and sealed pots are used to prepare dishes like kleftiko, where lamb cooks for hours until tender. Charcoal grilling is central to souvla, with large cuts of meat turning slowly over open flames. Stews such as stifado simmer gradually, allowing onions, wine, and spices to deepen in flavor.

These techniques are not rushed. They encourage gathering, conversation, and anticipation. Cooking is often as social as eating.

Meze as a Cultural Expression

Meze is not a single dish but a way of eating that reflects the staples of the Cyprus diet. A traditional meze can include grilled meats, dips, salads, cheeses, olives, and bread served in succession.

Rather than focusing on one large portion, meze celebrates variety. It allows diners to experience the breadth of local ingredients in a single sitting. Olive oil, herbs, dairy, grains, and slow-cooked meats all find their place within this format.

The structure of meze reinforces the communal nature of Cypriot food culture, where sharing is as important as flavor.

Local Dishes that Define Everyday Life

Many local dishes rely directly on these foundational ingredients and methods. Afelia highlights pork marinated in wine and coriander. Tava combines meat, rice, tomatoes, and cumin in a slow-baked clay dish. Koupepia wraps rice and minced meat in vine leaves, showcasing grains and herbs in delicate balance.

Even desserts reflect these staples. Honey, nuts, and citrus syrup appear frequently in traditional sweets, connecting the sweet course to the same agricultural roots as savory dishes.

The consistency of ingredients across meals creates a sense of continuity. Whether served at home, in a village taverna, or in a modern dining setting, these staples remain recognizable.

The Enduring Role of Hospitality and Modern Interpretation

The staples of the Cyprus diet are not confined to rural kitchens. They continue to influence contemporary dining across the island. Many restaurants and hospitality venues emphasize local sourcing, traditional preparation methods, and regional flavors in their menus.

Visitors often discover that even within hotel dining environments, the core elements of Cypriot cooking remain present. Olive oil, grilled meats, fresh herbs, and indigenous cheeses appear thoughtfully incorporated into curated menus. Those interested in seeing how traditional ingredients and techniques translate into modern hospitality can explore Golden Bay’s dining and bars section, where Mediterranean flavors reflect long-standing culinary traditions.

A Cuisine Built on Continuity

The staples of the Cyprus diet reveal a cuisine built not on fleeting trends but on continuity. Olive oil continues to flow generously. Bread remains central to the table. Herbs still perfume slow-cooked dishes, and clay ovens are still used in many communities.

What makes Cypriot food enduring is not complexity, but coherence. Ingredients, methods, and local dishes work together in quiet harmony. They reflect an island shaped by sun, soil, and shared history.

To explore these staples is to understand Cyprus itself. Each meal carries echoes of farmers, shepherds, fishermen, and families who have preserved culinary knowledge across generations. In every bite, there is both tradition and living culture — a reminder that the heart of Cypriot cuisine lies in its foundations.

read more
Cooking Tips

Pro Cooking Tips That Instantly Improve Your Meals

Great cooking isn’t about fancy equipment or secret ingredients. It’s about mastering a few professional habits that dramatically improve flavor, texture, and consistency. These pro cooking tips are simple, practical, and proven—small changes that make everyday meals taste restaurant-quality.

Season With Intention, Not Guesswork

Professional cooks season early, often, and thoughtfully. Salt doesn’t just make food salty—it enhances natural flavors.

Key practices to follow:

  • Season proteins at least 30 minutes before cooking for deeper flavor.

  • Taste at multiple stages, not just at the end.

  • Use kosher salt for better control and even distribution.

A well-seasoned dish should taste balanced, not salty.

Control Heat Like a Pro

Most home cooking mistakes come from poor heat management. High heat isn’t always better.

Smart heat control tips:

  • Preheat pans fully before adding food.

  • Use medium heat for aromatics to prevent bitterness.

  • Lower heat slightly once food hits the pan to avoid burning.

Consistent heat creates better browning and prevents dry or uneven results.

Let Ingredients Reach Room Temperature

Cooking straight from the fridge causes uneven cooking. Professionals avoid this whenever possible.

What to do instead:

  • Let meat, poultry, and fish rest 15–30 minutes before cooking.

  • Cold food drops pan temperature and prevents proper searing.

This simple step improves texture and helps food cook evenly.

Master Knife Skills (Speed Comes Later)

Sharp knives and proper technique save time and improve presentation.

Focus on:

  • Keeping knives razor sharp (a dull knife is dangerous).

  • Using a stable cutting board with a damp towel underneath.

  • Cutting ingredients to uniform sizes for even cooking.

Precision matters more than speed.

Build Flavor in Layers

Professional dishes don’t rely on one big flavor hit—they’re built gradually.

Layering techniques include:

  • Blooming spices in oil before adding liquids.

  • Deglazing pans with stock, wine, or vinegar.

  • Finishing with fresh herbs or citrus zest.

Each layer adds depth and complexity.

Don’t Crowd the Pan

Crowding traps steam, which prevents browning and causes soggy food.

Professional rule:

  • Cook in batches if needed.

  • Leave space between ingredients so moisture can escape.

Golden, crispy textures require breathing room.

Learn When to Leave Food Alone

Constant stirring prevents browning. Professionals know when not to touch food.

Examples:

  • Let meat sear undisturbed before flipping.

  • Allow vegetables to caramelize before tossing.

Patience equals flavor.

Rest Meat Before Cutting

Cutting too soon releases juices and dries out meat.

Best practice:

  • Rest meat 5–10 minutes (larger cuts up to 20).

  • Loosely tent with foil, don’t wrap tightly.

This keeps meat juicy and tender.

Finish With Acid for Balance

Many dishes taste “flat” because they lack acidity.

Quick fixes:

  • Lemon juice or zest

  • Vinegar or wine

  • Yogurt or sour cream

A small splash at the end brightens the entire dish.

Clean As You Go

Professional kitchens stay organized for a reason—it improves focus and efficiency.

Habits to adopt:

  • Wash tools while food cooks.

  • Keep a trash bowl nearby.

  • Wipe surfaces between steps.

Less mess means better cooking decisions.

Frequently Asked Questions

What’s the fastest way to improve flavor in home cooking?

Learning proper seasoning and tasting throughout the cooking process delivers the biggest improvement immediately.

Do I need expensive cookware to cook like a pro?

No. Heat control, technique, and timing matter far more than brand-name equipment.

Why does restaurant food taste better than homemade food?

Restaurants layer flavors, season aggressively, control heat precisely, and finish dishes with acid and fat.

Is resting meat really necessary?

Yes. Resting allows juices to redistribute, making meat more tender and flavorful.

How do chefs prevent food from sticking to pans?

They preheat pans properly, use enough fat, and avoid moving food too early.

What’s the most common home cooking mistake?

Overcrowding the pan and under-seasoning food are the most frequent issues.

How can I tell when my pan is hot enough?

Add a drop of water—if it sizzles and evaporates quickly, the pan is ready.

read more
1 2 3 … 6
Page 1 of 6